Showing posts with label Flowers and petals. Show all posts

Sunday, September 18, 2022

More Stencil Butters & Projects

 Hello again from design team member, Heidi!

I am making more projects with the Stencil Butters that are available in the Blank Page Muse store.  Part of this post will be me playing around with them and then I will use a couple of the backgrounds for projects.  

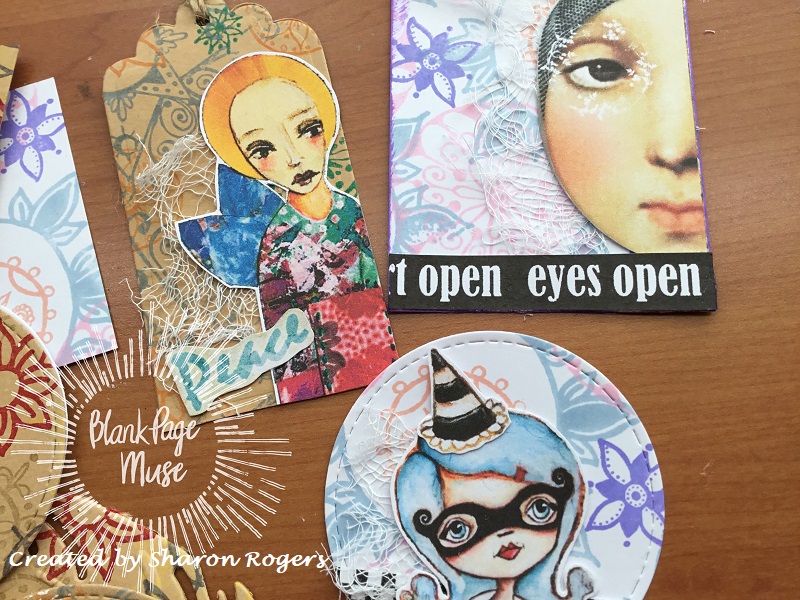
The first thing I did was to stencil over some of the Pam Bray patterned papers These papers are definitely thick enough to stand up to the stencil paste.  I really liked the nice opaque coverage. 


I then stenciled some of the apricot colored paste of the paper bag my order came in.  I messed up and a bunch got under the edge of the stencil.  So I went over it again with a metallic gold paste.  This one looks really cool in person and I plan to use it!


As I was going along, I randomly was using some excess paste onto scrap paper (this is the back of an order sheet, so just regular copy paper).  It was looking like this in the end, so I decided to thin out some of the red paste and just paint over the top. (This is one of the neat things about the paste, you can watercolor with it!) I wiped the excess off with a wipe and the parts that were dry resisted the paint and I think this is the coolest background.  You can see the result in the finished piece below.


The top piece is a home décor item that I finished using Ephemera from Pam Bray’s Masquerade line

The stamps for the finished card are from the Woodland Stamp set and Petals and Flowers stamp set, both in the Blank Page Muse shop.


I hope this gave you and idea of some different ways to use your stencil butters!  I will be back with more ideas another day.  Right now, I ‘d better go clean off my craft desk!  Have a great day!


You can also find more inspiration at the links below:

The Blank Page Muse- https://blankpagemuse.com/

FB Fan Page- https://www.facebook.com/groups/blankpagemuse/

Instagram Shop- https://www.instagram.com/blankpagemuse/

Instagram Blog- https://www.instagram.com/blankpagemuseblog/

Twitter- https://twitter.com/BlankPageMuse

Pintrest- https://www.pinterest.com/blankpagemuse/boards/

Monday, April 18, 2022

Petals & Flowers

 Hello from design team member, Heidi!  

I love this stamp set with what my mom would call the “pieces-parts” of flowers.  They are so fun to mix and match.  I have to tell you, I sat down to make a spring garden-style card, but what I ended up making was a sort of rich fall color medallion!  
Oh well, that is how creativity seems to work!


My background was made with distress oxide inks for the base shade, and then I pulled a print from my gelli plate over an old stencil.  

Over top, I stamped directly with the large flower outline, and then used foam tape to built up the flower center.  I kind of went crazy with the glitter glue in gold and iridescent glitters.  I don’t use glitter often but I do like glitter glue since it stays put!

The stamps can be found in the Blank Page Muse or I Brake for Stamps stores.  I will link them below.

Petals and Flowers designed by Michelle Fray Cummings

Sentiment is from Florals Sheet in the IBFS store.

You can also find more inspiration at the links below:

The Blank Page Muse- https://blankpagemuse.com/

FB Fan Page- https://www.facebook.com/groups/blankpagemuse/

Instagram Shop- https://www.instagram.com/blankpagemuse/

Instagram Blog- https://www.instagram.com/blankpagemuseblog/

Twitter- https://twitter.com/BlankPageMuse

Pintrest- https://www.pinterest.com/blankpagemuse/boards/


Sunday, March 7, 2021

Floral Patterns

                                                                        Hi BPM Fans!

Hope you are all well and enjoying our month of floral inspiration!

Today I am sharing an idea for making background patterned card for your atc's, ATcoins, tags, envelopes, card fronts - whatever you need a patterned background for!

You only need a few supplies so let's get started!


Supplies:
Blank Page Muse Stamps: Petals & Flowers Set designed by Michelle Frae Cummings
Blank Page Muse Stamps: Medallions Ornate Patterns & Flowers Set designed by Michelle Frae Cummings
Coloured Ink Pads
White and/or Kraft Card 

Instructions:


Use your stamps and ink pads to create a patterned background on your card - use complimentary colours and different size stamps to cover the entire piece of card.


You can get so many great effects - and you can be neat or messy with your stamp placement!


You now have some great patterned background card for creating with. Use a die cut machine to cut tags, trading coins etc. for use on any project! Add collage elements and embellishments!


Thanks for joining me!

Keep checking back here for more DT inspiration!
And remember to share your creations at our Facebook Group - we love to see what you are doing with all the fabulous stamps available in the store!

Happy crafting!

Sharon


Don't forget to check us out at all of our social media sites
The Blank Page Muse- https://blankpagemuse.com/

Thursday, January 23, 2020

A Mini Happy Birthday!


Hi Again BPM Fans!

We've had lots of fab birthday ideas this month - should keep you all inspired for any special occasions you have coming up for the year!


Today I am sharing a little concertina folded card which can be used for any occasion!


Supplies:
Blank Page Muse Stamp: "You are Wonderfully Wonderful" from Mermaid Fantasy Set
Blank Page Muse Stamp: "Flower" from Petals & Flowers Set
Blank Page Muse Stamp: "Happy" Word from Fairytale Fantasy Figures Set
12 x 12 Double Sided Scrapbooking Card Note: one sheet will make 4 mini cards!
3 x Pieces 7 x 7cm Coloured Cardstock in co-ordinating colour
3 x Pieces 6 x 6cm Plain White Card Plus small scrap pieces
Stamp pad in co-ordinating colour
Piece thin ribbon either a sheer white or co-ordinating colour
Square punch or Square Metal Die
Double sided tape, Glue, scissors

Instructions:
Cut your 12 x 12 paper into 3 inch width strips. Fold as shown below - in half and then fold back on each end to make the "concertina" fold. Use your square punch or die and cut a "window" into the front panel.


Adhere the plain coloured cardstock to the 3 inside panels as shown in the photo below.


Edge the pieces of white cardstock with your co-ordinating stamp pad, stamp a sentiment on one piece, stamp the "happy" word onto a scrap piece of card along with the small flower.


Adhere the white card pieces onto the base card as shown below. Attach the "happy" word to the card front with mounting foam and also use a small piece of mounting foam to attach the small flower in the square "window".


Fold the card and turn over. Attach a piece of double sided tape approx 1cm down from the top of the card back and adhere your ribbon centrally as shown below. Turn the card over and tie the ribbon in a bow.


Your card is now finished! You can write your greeting inside on the blank card before tying with the ribbon.


Happy Stamping!

Sharon

Don't forget to check us out at all of our social media sites
The Blank Page Muse- https://blankpagemuse.com/

Saturday, November 9, 2019

Rubber Stamped Tissue Paper Cards

One of my favorite things to do when creating cards, is to use common household items!
I love showing people that you don't need to spend much money to making something beautiful.
Ready? Lets create!  


Supplies used:

Wednesday, October 2, 2019

Quick Background Pages

Today our DT member Sharon is sharing a quick idea for making backgrounds using old book pages, washi tape, gesso, ink spray and Blank Page Muse Stamps.
This is a simple way to make backgrounds for ATC's, ATCoins, tags or even for adding into your journals or using to cover a notebook - just layer and adhere all the elements onto old book pages and stamp with your fav BPM rubber stamps!

Sharon used stamps designed by Michelle Frae Cummings
Petals & Flowers & Ornate Medallions

Have a production line going and make a stash to use when you are in a hurry!
Don't forget to check us out at all of our social media sites
The Blank Page Muse- https://blankpagemuse.com/

Saturday, August 10, 2019

Peek-a-Boo Owl Note Cards

Hi everyone! Michelle here with a super cute card I actually made up quite by accident! 
I was playing around with a flower-frame stamp and started reminiscing of a old TV game show I used to watch called Hollywood Squares. Remember that show?
 With all our favorite celebrities too! Funny right?
Well that's how this'peek-a-boo' card came about, so I hope you will enjoy my tutorial. :)


Supplies used:
Blank Card
White card stock scrap
Stamping ink pad
Colored markers
Scissors

1.  Ink and stamp this stamp (from the Petals and Flowers-set)  all over the front of your card.

2.  Stamp onto the scrap paper and cut out just the center of the design. This will create a 'mask'.

3.  Align the mask over each of the flowers, then stamp your "owl" every which way and that. 
Lift 'mask' to reveal your peek-a-boo-owl!


 4.  Upside down, right side up,side ways, ears first, feet first... Have fun with it!


 5.  Color in as shown. Add some dots to the background if desired.


I'm pretty sure once you get started, you wont be able to stop making some of these
'Peek-a-Boo' Owl Note Cards!
They are just so dang cute!

Looking for more Inspiration? Click the links below!

The Blank Page Muse- https://blankpagemuse.com/

Saturday, December 15, 2018

Mixed Media Art Journal Page With Petals and Flowers Stamps

 Hello all

Learn how I created  this mixed media art journal page using The Blank Page Muse stamps.


Blank Page Muse products used:


Art Journaling 


Background Grunge


Petals and Flowers
Medallions


Ancient Amber Embossing Powder


Other supplies:
Colored ink pads and sprays
Gel medium
Heat gun
Scissors
Adhesive


Spray ink onto your page then stamp grunge circles using different colored inks.


Spray more color, then use the texture stamps around the edges of the page.


Stamp out the large flowers and use gel medium in the centers to hold the embossing powder while you heat it.
Stamp out  more flowers with ink. Cut out and add to the page,
Finish with assorted embellishments.

Thursday, October 25, 2018

Mixed Media Amethyst Druzy Tag WIP Oct 25


Want to learn how to create this sparkling Druzy effect?
 Check out the tutorial  below.


Stencil mask
Modeling paste
Card
Ink pads
Mist sprays
Crackle glaze
Glitter
Gems


Spray a blank tag with purple mist sprays, then use a variety of purple colored inks to stamp randomly around the tag. 
Apply the modeling paste with a stencil and leave to dry.


Stamp out the flowers on to scrap card that has been sprayed over with mist sprays. 
Cut them out and apply some glue to the centers of the larger flowers. 
Sprinkle still wet glue with glitter, then seal with crackle glaze. 
This will take a few hours to set before you can add them to the tag.


Add burlap and a die-cut background to the center of the tag. 
I buy white burlap and either paint or ink it to match the color scheme. 
Decorate with gems and sequins.


Once the crackle glaze has set, a faux druzy effect will appear..

Thank you for  visiting and please follow us on social media 

The Blank Page Muse Shop http://blankpagemuse.com/
That's Crafty  UK And Worldwide here http://www.thatscrafty.co.uk/blank-page-muse.html
FB Fan Page https://www.facebook.com/groups/bla...


Copyright Text

Blank Page Muse 2018 Sin City Stamps 2013