Showing posts with label index cards. Show all posts

Tuesday, February 6, 2024

Forever February!

 Hi Creative Fans!

Today I am sharing an altered index card along with new digital download images available in store!


Products used:
Blocks Pattern Stencil designed by Deadseatoons
"Forever" word stamp from the Romance Classic Couples Set

I've used a 6 x 4 index card which already had a "painty" background from excess paint from another project! I used the block pattern stencil and added some texture paste.
I printed the digital page onto light cardstock and fussy cut the images I wanted to use.
I stamped the word "forever" onto fabric and sewed onto a piece of scrap patterned card by Pam Bray.
I arranged all the collage images and stamped wording onto the index card along with a vintage focal image (Tim Holtz paper doll).
To finish off I zigzagged a border with my sewing machine.


Hope you feel inspired to try something a bit different with the calendar download!


Check out my blog for more inspiration! 

***Remember to us the code BPMSharon at the store for 15% off ***
So many fab stamps to choose from!
Note: you can use the code at either the IBFS Store OR the BPM Store - why not do an order from each and increase your stash!

And visit our social media sites for more stamping fun!
I Brake For Stamps -https://ibrakeforstamps.com/ 

Wednesday, February 16, 2022

Feel like having a "Purple" day?

 Hi Stamping Fans!

Hope you are enjoying the DT inspiration here at the blog this month - I'm loving the new year and my resolution to make time for stamping and crafting - so far so good! Hope you are all getting lots of creativity time as well!


Today I have some "purple" themed altered index cards to share using lots of different products available in the BPM Store - I love when you can combine a range of products!
I love working to a colour theme as well and using some fun quirky collage images with stamps, stencils, paint & ink!


Stamps and Stencils used:
Dream Big Stencil designed by Magda Polakow
Feather Stencil designed by Donna Gray


Remember if you use the code BPMSharon at the store checkout you can save 15% on your stamp order - what better excuse do you need to go check out the huge range and nab some rubber stamps to create with! AND remember you can also use this code for discount at the "I Brake for Stamps" store as well! Fantastic way to build you stash of stamps and save some money!


Tuesday, September 28, 2021

Unicorns & Whimsy!

 Hi Again BPM Fans!

More Whimsical inspiration for you to finish off our month of Whimsy!

Just love the "Unicorn Wishes" stamp set designed by Donna Gray!
Unicorns have a magical whimsical feel and they are the perfect choice of stamps to finish off this whimsical month here at the BPM Blog!


Don't forget that you can also grab stencils at the store - perfect for all your creations - I've used "Slimline Stars" designed by Pam Bray.


Pop over to my blog for more details: CLICK HERE

Remember if you use the code BPMSharon at the store checkout you can save 15% on your stamp order - what better excuse do you need to go check out the huge range and nab some rubber stamps to create with!

Looking for more inspiration then click on the links below!

The Blank Page Muse- https://blankpagemuse.com/

Sunday, February 7, 2021

Stapled Together Forever!!!

 Hi BPM Fans!

Well here we are at the second month of the year already!

February - the month of "Romance" - and we will be bringing you lots of romantic creations so make sure you check back regularly to see what the DT are creating!

Today I'm using my scraps and some sentiment stamps only!


Quite some time ago - maybe several years ago now - oh my goodness time flies - I came across a "one staple" challenge idea - I can't remember where I first saw it but if you do a Google search you can see several people who have promoted this idea.

I love this idea because you can use up your "odds & sods" and you only need one feature stamp - perfect for the hoarders amongst us! 

Hope you enjoy the concept and have a go yourselves!


Supplies:
Blank Page Muse Stamp: Love Word Stamp
Blank Page Muse Stamp: Forever Word from Romance Classic Couples Set
Blank Page Muse Stamp: Every Single Day
Index Cards - any size - 5 x 3 inches used for these
Scraps of coloured/patterned/textured paper and old book pages
Black or coloured ink pads and scrap white card
Stapler and "ONE" Staple!!!

Instructions:


Start by gathering some index cards and lots of bits and pieces of scrap paper and book pages. Stick to a colour theme for each index card - makes everything co-ordinated and it's fun to use different shades of a colour - match your stamp ink with your chosen colour!


Stamp your sentiment/word stamp onto cardstock - use black ink or the same colour as your chosen papers. If you want edge your index card with the coloured ink pad. I have a "fear" of excess white so I like to ink the edge of my cards!


Layer your papers and stamp to fit the index card - remember the aim is to use just "one" staple to attach everything to the index card! You have to love a "challenge"!


You can make lots of these at once - they are great to make affirmation cards and perfect for using your favourite Blank Page Muse Phrase/Quote Stamps!


I like to make these and put them on the wall in my craft room for inspiration and creativity!

I would love to see your stapled cards so make sure you share them at our Facebook Group!

Happy stamping!

Sharon


Don't forget to check us out at all of our social media sites
The Blank Page Muse- https://blankpagemuse.com/

Thursday, July 25, 2019

Just Us Girls Journaling

Hi Again Blank Page Muse Stampers!
Hope you are all enjoying our colourful month of inspiration!
I decided to create some "journaling" cards which are great for making notes and recording your thoughts!
And to make it quick and easy I've made them with only minimal supplies - perfect for those on a budget and also perfect for using up your bits & pieces of left over card and paints!
You can also adapt this style to your bullet pages and journals!
Hope you have fun!
Supplies:
Blank Page Muse Stamp Set: Just Us Girls
Blank Page Muse Stamp Set: Art Journaling #2
Index Cards 6" x 4"
Acrylic Paint 3 colours
Old Gift/Credit Card
Black Card
Embossing Ink and Fine White Embossing Powder
Black Archival Ink
Tools: glue, double sided tape, heat gun, scissors
Instructions:
Gather your index cards, paint and gift card.

Place "blobs" of paint along the left hand side of the card at the top.


Use the old gift card to drag the paint from the top to the bottom. You should have enough paint on the gift card to paint another index card. Allow to dry.


While the paint is drying stamp the "Just Us Girls" onto black card using your embossing pad. heat emboss with fine white embossing powder. Fussy cut the gals!


Using you Black Archival Ink stamp your choice of wording from the Art Journaling #2 stamp set directly into the index cards. Use the little cross to act as "bullet" points for your notes and jottings!


Use double sided tape or glue to adhere your fussy cut gals to the side of the card where they stand out on the bright coloured paint!


Try playing around with other Blank Page Muse Stamps and colour combos and hae fun creating these cards!


Use your journal cards on their own, in your journals or diary - have fun with them!


Happy Stamping
Sharon
Don't forget to check us out at all of our social media "haunts"!!!
The Blank Page Muse- https://blankpagemuse.com/

Thursday, January 18, 2018

Morbid Curiosity


Hi Fans!!
Can you believe it is 2018????
I'm really looking forward to the coming months and enjoying stamping
 and creating with my Blank Page Muse rubber!!
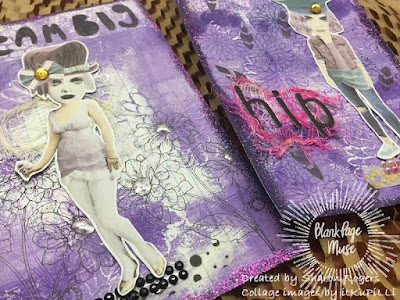
Today I am sharing a gelli plate printed altered index card using the colours of our challenge theme for this month "Turquoise & Silver" - great colour combo to create with!!
Supplies:
  • Sin City Stamp Set: "Oddly Appealing" by Cathy Frailey
  • Gelli Plate
  • Acrylic paints in turquoise & silver
  • Stencils
  • Ruled Index cards 6 x 4" (or any size cards you wish to use, cut your own or even a journal page)
  • Silver metallic card scraps
  • Black Archival Ink
  • Glue
  • Tools: brayer, scissors
  • Embellishments: corner charms, braid/mesh, muslin/cheesecloth scrap, cotton, gems
Instructions:
Start by gathering all of your goodies for printing your background card. It's always great to get lots of extras printed when you have your gelli plate out - good to have some ready made backgrounds in your stash!!


Put some "blobs" of paint on your plate and spread out with your brayer.


Layer a stencil over the top and smooth an index card over the top. Index cards have a great absorbent texture which I think is one of the reasons I like using them so much for gelli printing!!


Use another index card to pick up the paint left once you have removed the stencil. Hint: your stencil has paint on it to - I always have a large blank page open in my journal and use that to remove excess from the stencil - another great way to slowly build up another background for future use!!


Continue adding paint and stencil and more layers to your cards. Everyone has their own favourite way to gelli print so just have fun and colour your background card!


Envelopes are great for mopping up paint and also cleaning excess from your brayer. You can decorate the envelopes with stamps and have some great mail art to send your trade creations in!!


Some "extras" (cards and envelopes) made for future use!!

While all your printing is drying gather your stamping supplies and embellishments ready to decorate the card.


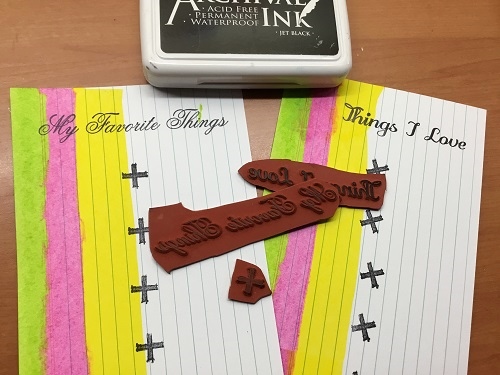
Stamp your images from the "Oddly Appealing" set onto the silver metallic card with Black Archival Ink and cut out.


Edge your index card with Black Archival Ink to create a border.


Layout out your embellishments and when you are happy with how they are arranged you can adhere them to the card with glue. The picture below shows the embellishments used for the layout of this card: silver corner charms, strip of braid/mesh, ink sprayed muslin cloth, cotton & sticky gems.


And your card is finished!


I love using the ruled cards - I like the lines showing through for added interest and texture - I just love the effect!
You might ask what can you do with your completed project?
Here are some hints on using your printed and embellished cards:
Add a postcard back and send to a fellow crafter!!
Use as a card front by adhering it to a folded card!
Incorporate onto a journal page as a focal point!
You can cut down your printed card to 2.5 x 3.5" size before embellishing and use as an ATC base for creating and trading!
Thanks for joining me and I hope you have enjoyed the process!
We hope to see you join our collage challenge this month using your Sin City Stamps and the gorgeous colours of "Silver & Turquoise"!!!
Happy stamping and remember to join us at our Facebook Group as well!
Sharon

Copyright Text

Blank Page Muse 2018 Sin City Stamps 2013