Showing posts with label Silhouette Stamps. Show all posts

Sunday, September 15, 2024

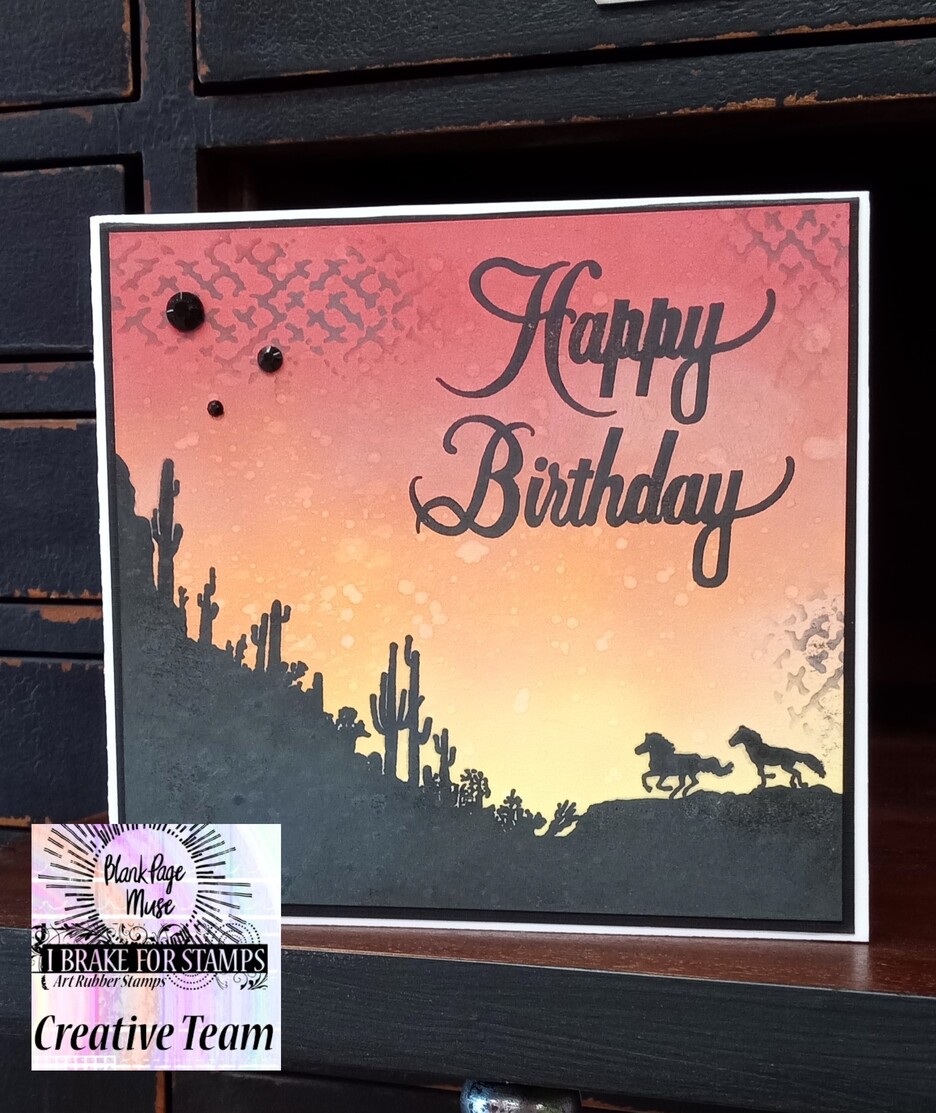
Running Horses & Cactus Silhouette at Sunrise

 Horses are beautiful animals. 

Horses running free are majestic! 

This silhouette of the horses running in the desert against the setting sun is MAGNIFICENT!!  

On this card I wanted to create a sunrise.  The horses running with the sunrise behind them reminds me of the OLD WEST. 


I Brake for Stamps used:
Horses and Cactus Silhouette
Happy Birthday Sentiment

Stencil from Blank Page Muse
TCW554 Stencil Butterfly Collage - 6x6

Other supplies: 

Tim Holtz Distress Oxide Inks 
Squeezed Lemonade
Festive Berries
Spiced Marmalade
Scorched Timber
Blending brushes
White Cardstock
Card base
Water in Spray bottle
Staz-on Black Ink
Stamp Platform
Paper towel
Heat tool
Parchment Paper
Gems

To create the sunrise I blended my Tim Holtz Distress Oxide Inks: Squeezed Lemonade, Festive Berries and Spiced Marmalade on white cardstock with blending brushes or any blending tool. I started with the Squeezed Lemonade working toward the darker Festive Berries.


Using a stamping platform and Staz-on Ink I stamped the desert silhouette with the running horses. After the set I lightly spritzed the card with water and dabbed it off with a paper towel, then dried with a heat tool.  This gave the sky some interest.


For the placement of Happy Birthday, I used baking parchment paper with lines over the stamped image. This helps to see if I got the sentiment lined up. Then I stamp the sentiment on the parchment, if it is straight, I carefully remove the parchment and stamp directly on the inked panel.
 

After getting to this point, I found I had a smudge on my panel! I was really happy with the inking and did not want to start over.  I was up for the creative challenge... What do I do to redeem my panel.  Stencil are your friend in this instance.  


Using the - Butterfly -stencil,  I gently stenciled over the smudge with Tim Holtz Distress Oxide Scorched Timber and then in two other areas on the card. It looks like I intended to add the stenciling. Three black gems were added to the upper left. 

The panel was then mounted on a black mat and adhered to a card base. 

What do you think of my creative save?


Please visit our social media sites for more stamping fun!

I Brake For Stamps - https://ibrakeforstamps.com/
The Blank Page Muse- https://blankpagemuse.com/


Thursday, September 5, 2024

Cactus Silhouette at Sunrise

Good morning my stamping friends! When I saw the silhouette cactus image, I knew I wanted to create a sunrise background to stamp the image on.  I love how the Oxide Inks blend creating an early morning sunrise. 


I Brake for Stamps used: 

Other supplies: 
Tim Holtz Distress Oxide Inks 
Squeezed Lemonade
Festive Berries
Spiced Marmalade
Blending brushes
White Cardstock
Card base
Staz-on Black Ink
Stamp Platform
Parchment Paper
Gems


First blend the Tim Holtz Distress Oxide Inks: Squeezed Lemonade, Festive Berries and Spiced Marmalade with blending brushes.  I always start with the lightest color and work toward the darkest color.  


On a stamping platform or acrylic block stamp the cactus image.  I choose to make this a sunrise, so the reddest ink is at the bottom half of the card. 


To get the placement of my sentiment on straight I place parchment over the stamped image on the stamp platform.  I like using baking parchment with the lines. Then I stamp the sentiment on the parchment to see if it is straight.  Once I am happy with the placement, I carefully remove the parchment and stamp directly on the inked image. 


I necessary trim the edges of the stamped cardstock and then mount on the card base. Add gems if desired. 


What do you think of my desert sunrise?  Give it a try!  
Until next time, Happy Stamping! ~Lyneen


Please visit our social media sites for more stamping fun!


Sunday, September 11, 2022

Charming Silhouette Card

Greetings!  Today I am excited to share this adorable silhouette card I created using my I Brake for Stamps stamps! I just love this little girl and her doggie!   And I love the look of silhouette stamps! I can almost picture her telling her little friend to wait while she catches fireflies! 


Supplies needed

I Brake For Stamps Girl and Dog Looking Eye to Eye Silhouette Stamp

I Brake for Stamps Half Sheet 138B

Masking paper, archival ink ( black and grey) , distress inks, Card base, white card stock, coordinating card stock, chipboard sentiment


Start by stamping your wildflowers from your I Brake for Stamps Half Sheet 138B onto white cardstock with grey archival ink. 


Stamp I Brake For Stamps Girl and Dog Looking Eye to Eye Silhouette Stamp over your wildflowers with black archival ink.  I did stamp it a few times to make sure the silhouette was good and black. 


Cut or punch a circle from masking paper and place over section of background as shown. 


Apply distress inks over the background. 
Remove masking paper to reveal moon. 


Matte onto coordinating card stock and adhere to card base.  Add chipboard sentiment to finish your card. 

I hope you are inspired to get creative with your stamps and papers from Blank Page Muse and I Brake For Stamps.  Don't forget to use my discount code BPMChris. 


Be sure to follow us at 

The Blank Page Muse- https://blankpagemuse.com/


I Brake for Stamps-https://ibrakeforstamps.com/


FB Fan Page-  https://www.facebook.com/groups/blankpagemuse/


Instagram Shop-  https://www.instagram.com/blankpagemuse/


Instagram Blog-  https://www.instagram.com/blankpagemuseblog/


Twitter-  https://twitter.com/BlankPageMuse


Pintrest- https://www.pinterest.com/blankpagemuse/boards/


Saturday, June 18, 2022

Silhouettes Card Set

 Hello from design team member, Heidi.  

I recently was playing with this set of stamps from the I Brake for Stamps store simply called Silhouettes #1.  It has a variety of old-timey, maybe Victorian silhouette images. I find them so charming!  I had out this set of watercolor-looking modern patterned papers, and I decided they were going to work together!  I think they did!


The sentiments are from Half Sheet 138B.

I simply stamped the images over top of the patterned paper.  Some I die cut and some I added a little sponged ink.   The green card was put over a background that I created with the flourish stamp in the set. 


The purple card was put over top of a watercolor background I had made with Shimmer Colorbursts. 


This last card I decided to make a mini Slimline card and the image was just the perfect size!  I also added some bakers twine as trim.


 So cute! I really like how these turned out!


It was fun to create several cards all at once using the same set!  Which one do you like best?


Copyright Text

Blank Page Muse 2018 Sin City Stamps 2013