Showing posts with label Art Journal 3. Show all posts

Wednesday, September 23, 2015

Alice Dreams....

Hello All Lanette Here!

Today I'm going to share a fun little tag featuring a Alice from the 

First lets take a look at my bright little tag and then I will take you through my process.


,Sin City Supplies Used:  Alice Art Rubber Stamps &  Art Journal 3

Other Products Used: Ranger Archival Ink, Prism Watercolor Pencils, Ranger Water Brush, Distress Inks & Tulle.

Now lets look at my process......

I started by stamping Alice with a waterproof ink.


Next I colored my Alice  in with a my watercolor pencils.


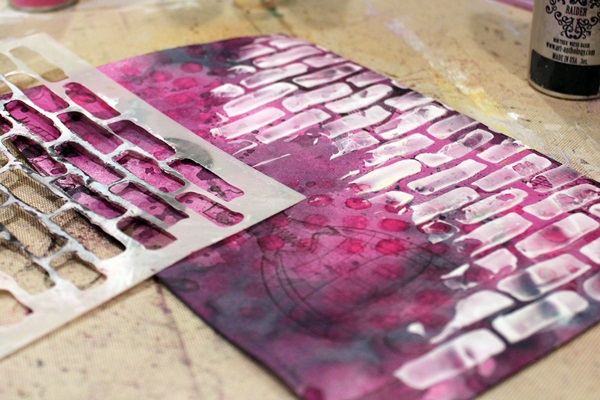
Then I moved on to my tags background, I used a bit of Distress Ink to create a blended background.


Next I added a bit bit of random stamping using the Art Journal 3 set. Then I added a bit more water and a bit more Distress Ink colors off my mat.


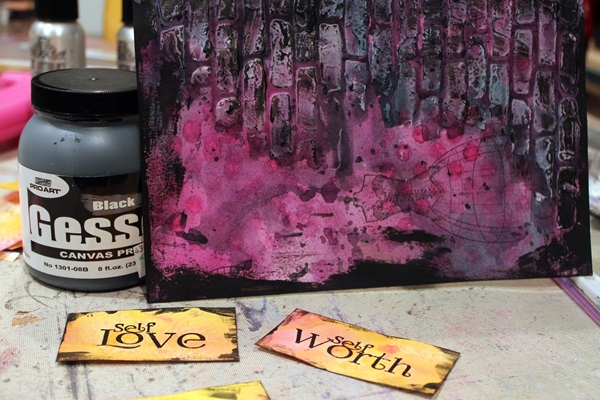
Then I mopped up my messy mat with a bit of tulle and  gave my bow a pretty blue bow.


After my tag was dry I added Alice  to my tag and gave  her a little shadow using a bit of watercolor.


And that's it easy peasy a pretty little tag :)


Thank you so much for stopping by today!

I hope that I have inspired you to have some inky fun of your own!

After all time flies! You gotta get inky when you can!

Remember to like us on Facebook and stop by the store for all your stamping needs!!

As always feel free to stop by my blog Stacks of Scraps anytime!


Wednesday, August 26, 2015

I'm in love with Mixed Media!

Hello All Lanette Here!


Today I'm going to share a pretty little layout that I created using the fun Anime Fairies 2 Art Rubber Stamps Art Journal 3 Stamp Sets.

First lets take a look at my layout and then I will take you through my process.


Sin City Supplies Used  Anime Fairies 2 Art Rubber Stamps Art Journal 3 Stamp Set

Other Supplies Used: Stazon Ink, Faber Castell Markers, Distress Ink, Art Anthology Velvet, Art Anthology Colorations Spray, Creative Embellishments Chipboard, Liquitex Modeling Paste, Misc Stencil, Prima Flowers, Misc Lace, Cheese Cloth & Twine


Now lets look at my process......


I started by building my background up using a a few scrap dictionary pages. After I added my pages I randomly stamped over the dictionary pages with a fairy stamp from the   Anime Fairies 2 Art Rubber Stamps. (This gets covered up but its all about the layers !!)


/

Next I addded a layer of modeling paste for a bit of texture.


My next step was to start adding color I added a mix of Art Anthology Colorations and Velvet.


I continued to add to my background by randomly stamping words from the Art Journal 3 Stamp Set with coordinating Distress Ink colors.


 After I added the words, I continued adding random images with darker inks, I used a mix of  stamps from the  Anime Fairies 2 Art Rubber Stamps Art Journal 3 Stamp Set.


You can see a bit of this stamping here ;) 


After I was happy with my background I started making a few layered butterfly embellishments. First I colored a dictionary page with Art Anthology Colorations spry, After it was dry I stamped the page repeatably with a butterfly from the Anime Fairies 2 Art Rubber Stamps.


Then I fussy cut all theose little guys out and layered them up, aren't they cute! 


After I added these little guys to my flower clusters my page was complete!!


A few Details just for Fun!


Thank you so much for stopping by today!

I hope that I have inspired you to have some inky fun of your own!

After all time flies! You gotta get inky when you can!

Remember to like us on Facebook and stop by the store for all your stamping needs!!

As always feel free to stop by my blog Stacks of Scraps anytime!


Wednesday, June 24, 2015

Art Journal with Lanette

Hello All Lanette Here!

Today I'm going to share a pretty little Art Journal Page with you :)

First lets take a look at my finished page ,then we can take a look at how I made it.


Sin City Supplies Used: Dressform Stamp SetArt Journal 3 Stamp Set

Other Supplies Used: Stazon Ink,

Now lets look at my process......

I started by randomly stamping a few of the Dressform Stamps with a waterproof ink, I used Stazon.


After  stamping I covered my Page completely using a mix of Art Anthology Colorations Spray.


 Next I stamped my Text using a few quotes from the Art Journal 3 Stamp Set, to add a bit of a pop I embossed my images.

Next I colored my verses with a contrasting Colorations Spray.


Now it was time to add a bit of texture to my page, using a stencil and some modeling paste I added these fun bricks along the side of my page.


Just to frame and add a bit of a grungy look to my page I used my finger to roughly added a bit of black gesso around my page and over my bricks.


before I added my verses to my page I randomly stamped around the page with this pretty little flourish stamp from the Art Journal 3 Stamp Set.


 And there you have it a quick but pretty page in your Art Journal!


Thank you so much for stopping by today!

I hope that I have inspired you to have some inky fun of your own!

After all time flies! You gotta get inky when you can!

Remember to like us on Facebook and stop by the store for all your stamping needs!!

As always feel free to stop by my blog Stacks of Scraps anytime!

Wednesday, May 27, 2015

A Bit of Sass!


Hello All Lanette Here!

Today I am up sharing a sassy little tag backed full of fabulous color!

Before we get started  lets take look at my finished tag, then I will show you how I made it! :)


Sin City Supplies Used:  Rosette Heart Boarder, Dressforms, Art Journal 3

Other Supplies Used: Art Anthology Colorations & Sorbet, Staz On Ink & Faber Castell Pitt markers, May Arts Ribbon, Tulle, Vellum & a Button.

Now lets look at my process.

I started by adding a bit of color to my background....


To add a bit of texture to my background I just flipped my tag and dabbed it in the over-spray that was still on my craft mat.


 After my first lay of color was dry I added a bit more to my background using a stencil and a lighter color of Colorations spray.


Next I stamped one of the fun Dressform images, using stazon ink.


Then I stampeded the same Dressform on another paper and fussy cut the corset out.
** I did go back and use gold instead of red.


 Next I attached a bit of tulle using my tint attacher.


 A bit mor stamping using the fabulous Rosette Heart Boarder.


 Next I added a bit more movement to my backgrond using a Pit Marker and a flourish stamp from the  Art Journal 3 rubber plate.


Finally to add a bit of texture and sparkle to my tag I used some Art Anthology Sorbet through a stencil.


Put that all togther and add a fun verse stamp from the Art Journal 3 rubber plate and you have one Sassy Little tag!


And just a few details for fun!


Thank you so much for stopping by today!

I hope that I have inspired you to have some inky fun of your own!

Remember to like us on Facebook and stop by the store for all your stamping needs!!

As always feel free to stop by my blog Stacks of Scraps anytime!

Copyright Text

Blank Page Muse 2018 Sin City Stamps 2013