Saturday, March 17, 2018

Beautiful Journey ATC's

Hi Blank Page Muse Fans!!
Are you loving this month's theme of "ATC's"???
I love creating and trading ATC's so this is a fun month for me!
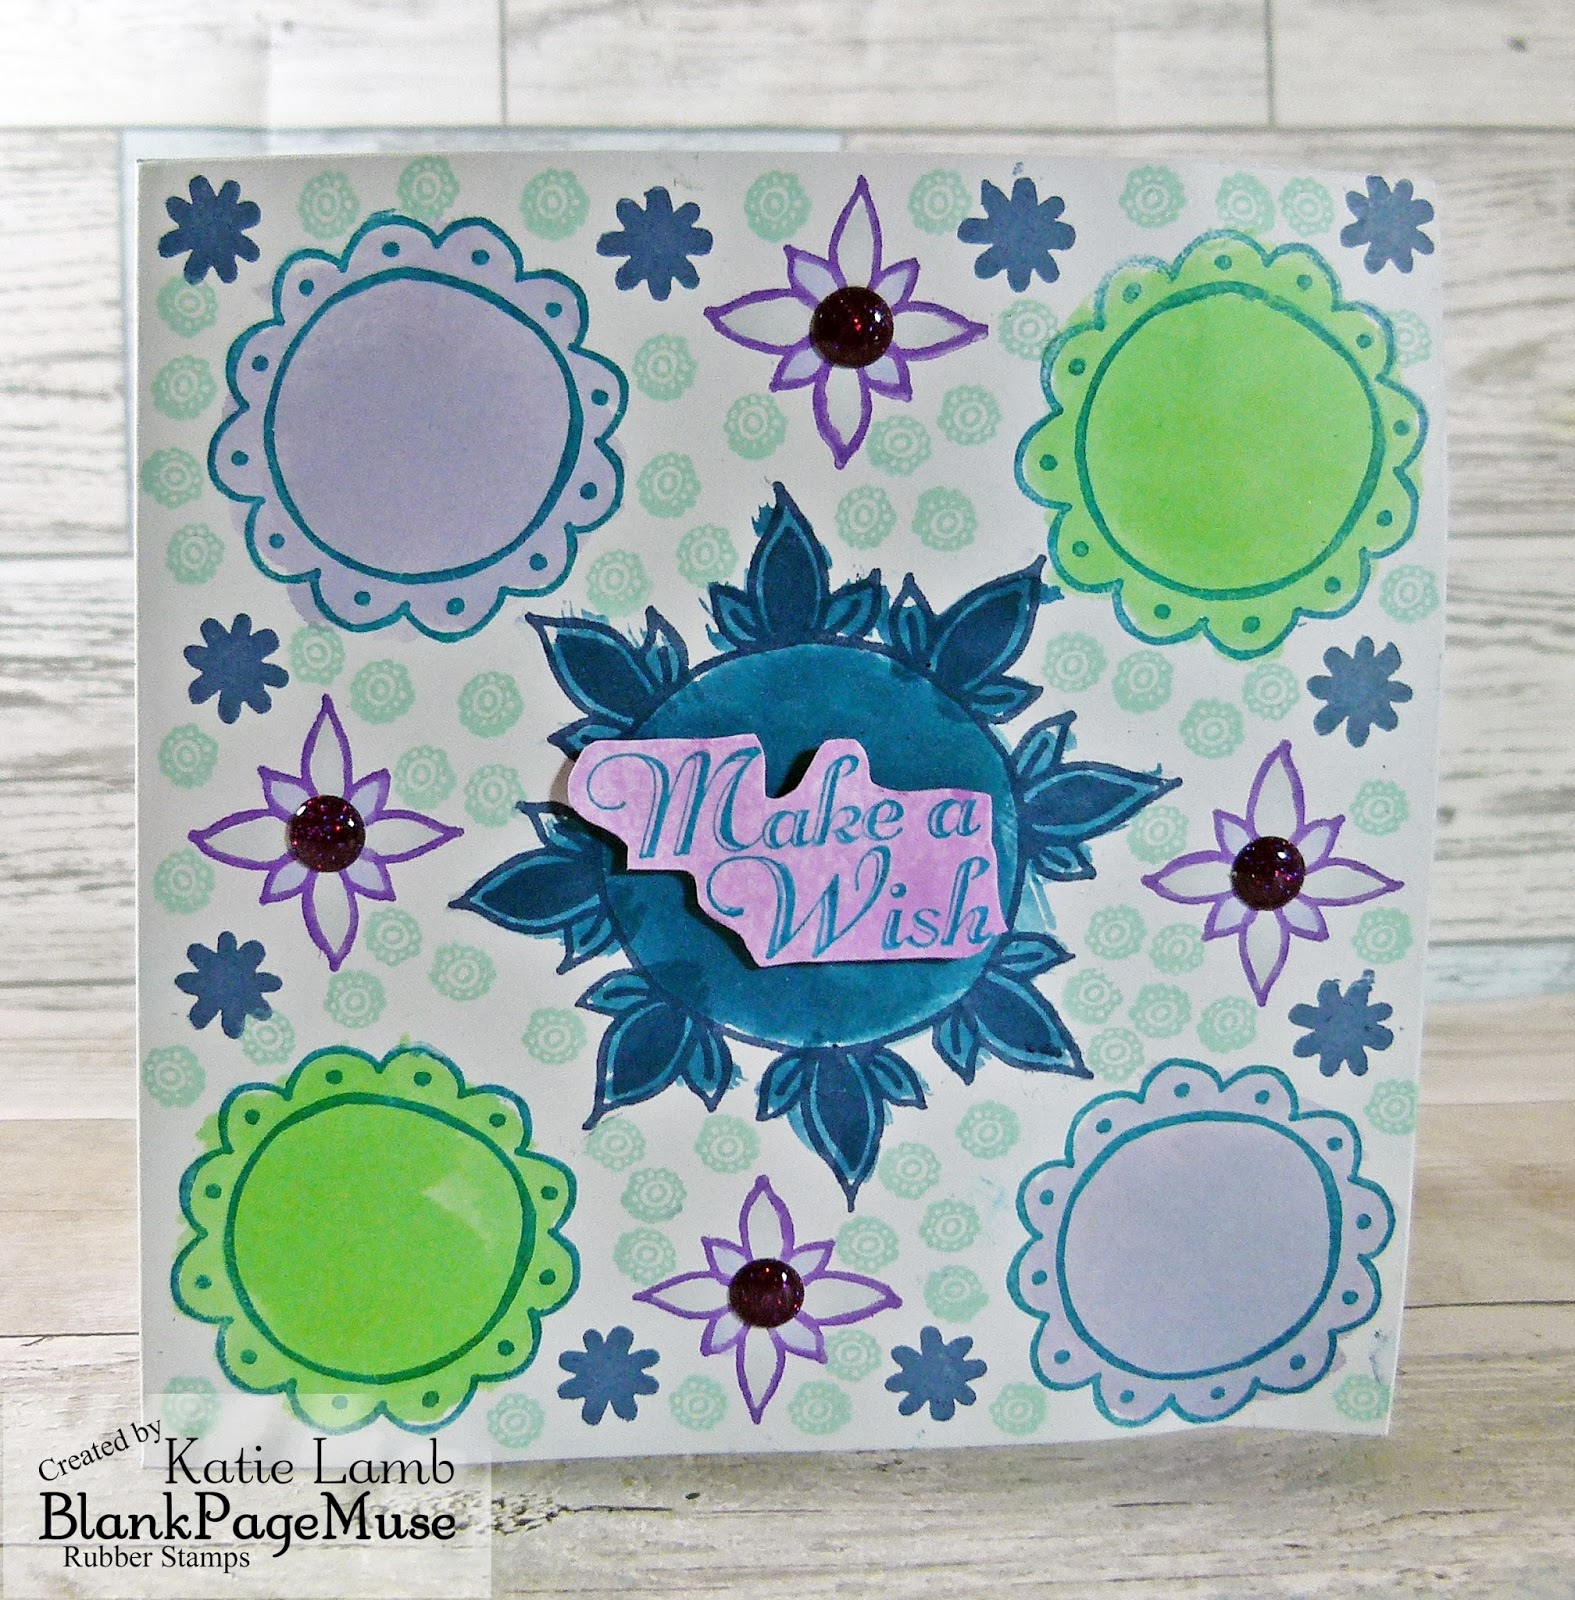
Today I am sharing my step by step process for these collage style ATC's - stamps are used on the background as well as the focal images.
Hope you enjoy the process and have a go yourself!
Remember to enter our current challenge with your ATC creations!
Supplies:
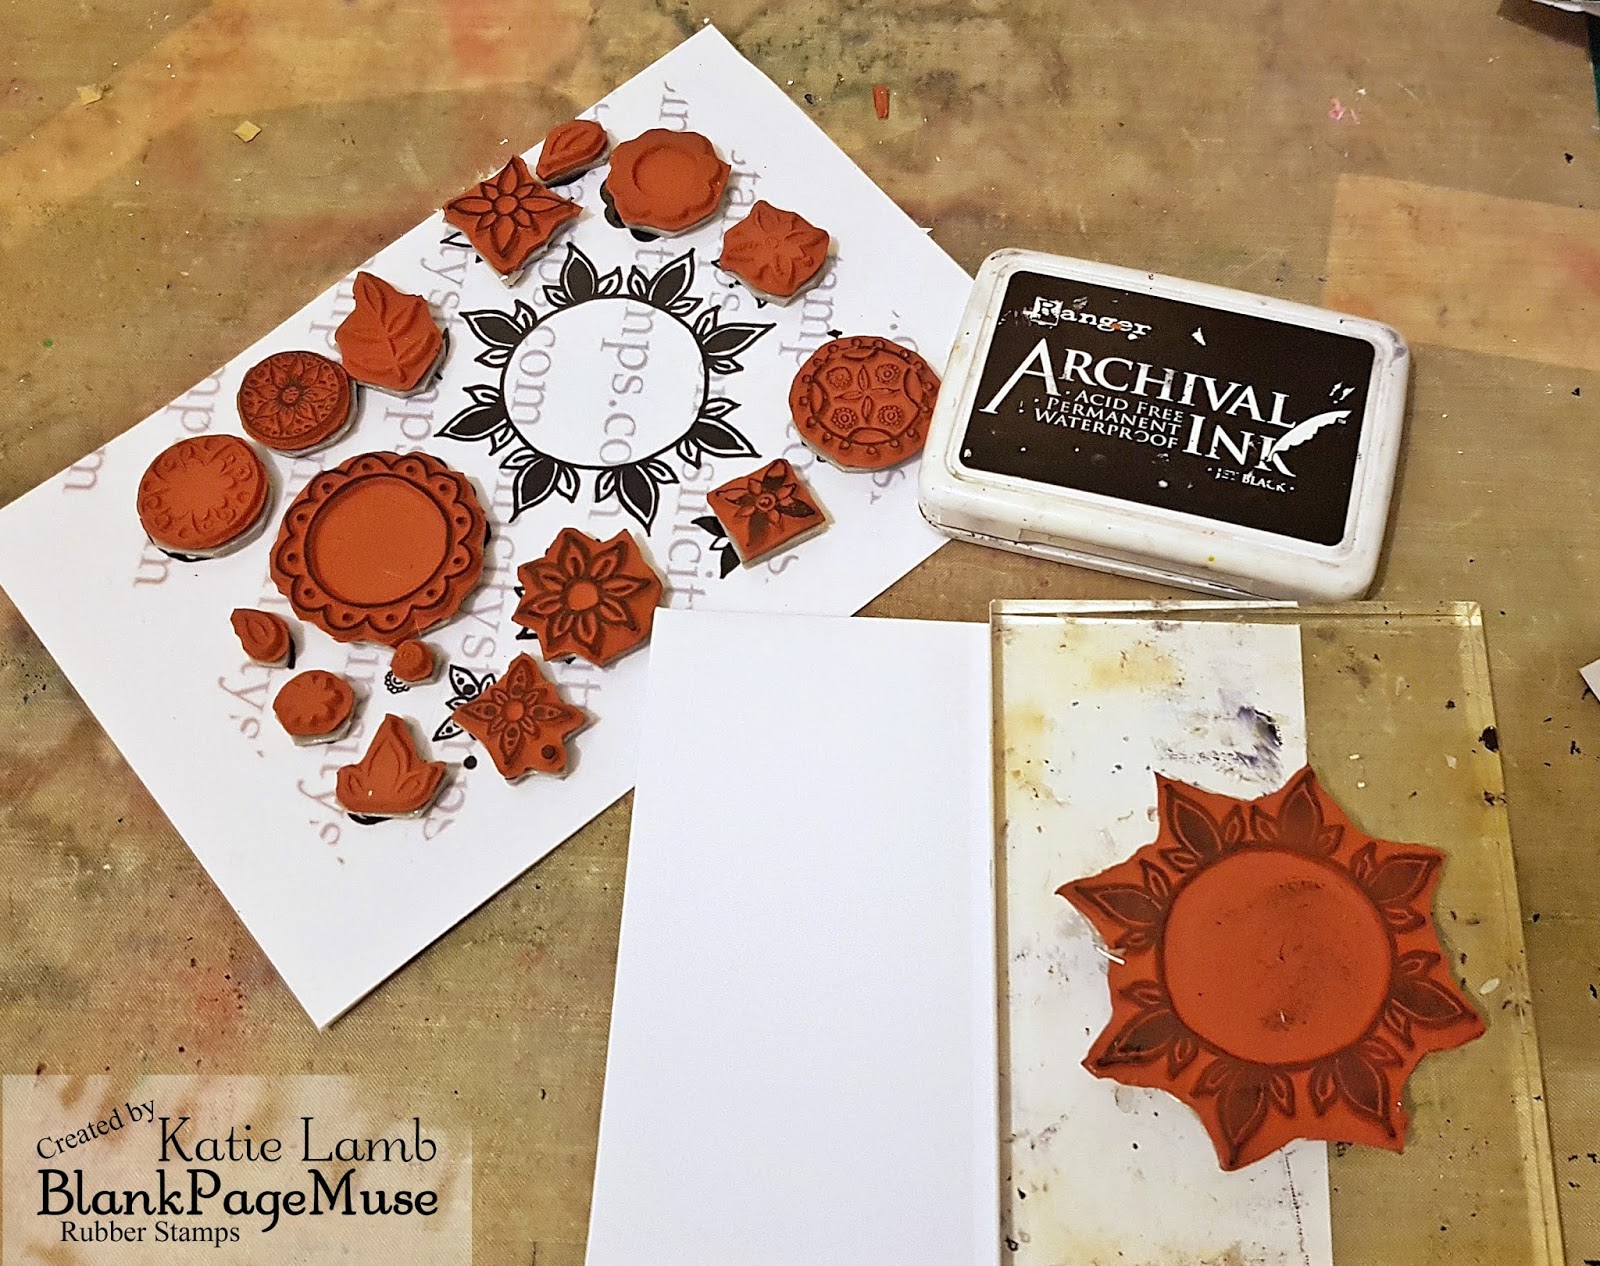
  • Blank Page Muse Stamps: Petals by Michelle Frae Cummings
  • Scrap card which will be cut to ATC size once "decorated": old manila folder used for these ATC's
  • Coloured tissue paper
  • Paper doilies
  • Acrylic paints: up to 3 colours
  • Ink pads: various co-ordinating colours & black
  • Collage elements: Art Tea Life images and wording used for this project
  • Posca Pen
  • Nuvo crystal drops
  • General supplies: sponge, scissors, glue, gel medium, spatula
Instructions:
Gather your coloured tissue paper and tear into strips. Cut the doilies into pieces.

Adhere the coloured tissue paper and doiley pieces randomly over the piece of card using the gel medium. Allow pieces to overhang the sides of the card. Allow to dry and trim the overhang from the edges.


Choose a few complimentary paints and add in "dollops" to the card and use a sponge to spread over the page to "tone down" the background colour. Keep the paint relatively thin so you can still see the colour and doiley pattern underneath.


Once the paint is dry choose some small stamps from the Petals set and stamp in different coloured inks to the background card. Allow the ink to dry.


Cut your card to ATC size: 2.5 x 3.5 inches.


Next step is to use one of the frame stamps from the set. Stamp onto some scrap card (manila folder scrap used for this project) using black ink. Fussy cut the image and also cut the centre from the frame.


Start to play around with your collage images and wording. Place "faces" behind the Petals frame to form a "head" for the collage element bodies. It's always fun to make cute whimsical characters!


Adhere the collaged characters to the ATC along with a "word". Edge the ATC's with a Posca pen to give a finished look. Using the Nuvo Crystal Drops add to the petal fram over the stamped dots for some added colour and texture.


And now you have 2 cute little ATC's to trade! Remember to add an ATC backing stamp as well to add all your details when trading. You can find a great set by Michelle Frae Cummings "here" in the store!

Hope you have enjoyed this and feel inspired to make some ATC's for our challenge - there are so many great stamps available to use!!
Don't forget to join our Facebook Group for fun and inspiration and to share your Blank Page Muse creations!
Happy Stamping!
Sharon

Thursday, March 15, 2018

How to create a simple card with just stamps


Hi all

I have a mixed media card to share today. 
My first attempt at a stamps only card which took me two attempts to get right, but was fun to create!

Supplies used:
Blank Card
Navy Blue ink pad
Green Ink pads
Gems
Watercolors
Marker pens


  • Stamp the largest Petal stamp near the center of your card.


  • Add some flowers.


  • Next stamp out the circular petals in all four corners of the card.


  • Fill in remaining spaces with random little flowers.


  • Color in the large petals with watercolors and the little flowers with marker pens.


Finish by adding a sentiment and gems to the centres of the smaller flowers.

Don't forget to visit our Fan Page for more Blank Page Muse idea's!


Tuesday, March 13, 2018

Flutter By ATC


March is ATC month here at The Blank Page Muse, so I'm back with another ATC that uses beautiful gilding!

Supplies:

Blank Page Muse: Love of Butterflies Stamp Set
Blank Page Muse:  Barbed Wire Brick Wall Background
Blank ATC
Vellum
Distress ink (orange, blue, pink)
Archival Ink (black)
Paint pen (black)
Gilding flakes
Gilding glue
Inkssentials Rub-It Scrub-It Pad
Blending Foam
Matte gel

1.  Use a few rows of the brick wall portion of the background stamp for a border around my ATC. Sponge on some gilding glue with the blending foam, then stamp around your ATC edges - I laid the card on top of the stamp. Clean your stamp off with water - the glue can really muck it up if it dries on it!


2.  Sprinkle your gilding flakes over the stamped area using your fingers. It's important not to have a fan on - the flakes will fly everywhere! 


3.  Gently swirl your scrubber piece over the flakes which will adhere them to the glue & get rid of the big pieces, giving you a clean print. Put any excess back in your jar. 


4. Pick 2 butterflies and ink them with the different distress colors, stamping 2 each onto your vellum. Reink between stamping, changing up the color scheme. 


5.  Cut out your butterflies and ink the edges with black ink. Then glue one butterfly on top of the other in the middle only so you can bend the top wings up. 


Now put it all together! Use your ink pen to write a sentiment & adhere your butterflies! 


Why not come join us at The Blank Page Muse Stamps Fan Group and show us your planned - or totally unexpected - Blank Page Muse creations! 
Don't forget to enter our monthly challenges to win some great prizes!
Challenge for March- ATC, enter yours here!


Sunday, March 11, 2018

Blank Page Muse Fan Art by Irena Stefanova


Today's Fan Art is by Irena Stefanova.
She is a mixed media card maker from Bulgaria. 
Here she has created 2 lovely spring cards 
From the Blank Page Muse stamp set


See more Fan Art creations here!

Saturday, March 10, 2018

ATC - Group Challenge

Welcome to the Blog! 
This month the designers have come together
 to show  you their creative interpretation on this months theme:
 ATC's!

Click on each designer to see more of their project creations!


 Stamps used:


Designer: Chris Pozzi
Stamps used:
 Big Bold Blossoms


Designer: Karen Sessions

Designer: Jess Madaglia
Stamps used:


Designer: Sharon Rogers
Stamps used:


Designer: Katie Lamb
Stamps used:


Designer: Cathy Norton
Stamps used:
 Largest Water drop


Designer: Leslie Turner
Stamps used:
 Classic Spark Rubber Stamp Set (diamond background)


Designer: Jenn DuBell
Stamps used: 
Correspondence (background script)
Background Grunge (background circles)


Stamps used:

We love all these wonderful ATC's made by our amazing creative team!
We hope you'll have fun playing along, too.
Come back and link up your project below,
 The challenge is open
 from March 10th until April 5th, Midnight Pacific Time. 
The challenge rules can be found HERE


Friday, March 2, 2018

Time for Love ATC

Hi, It's Karen here to share today's "Quick Idea",  I used a gold gel pen to add some accent details to stamped designs and add some hand drawn doodles.
* (TIP: Use clear glossy accent paint to add dimension and apply it in place of a brad in the center of each clock.)

Blank Page Muse Stamps:
Birds & Clocks Rubber Stamp Set
http://blankpagemuse.com/flower-bird-sketches-art-rubber-stamp-sheet-set-sc97/

Rosette Hearts Rubber Stamp Set
http://blankpagemuse.com/rosette-hearts-rubber-stamp-set/

Live. Love. Laugh Word Phrase Art Rubber Stamp
http://blankpagemuse.com/live-love-laugh-word-phrase-art-rubber-stamp/
Other Supplies:
  • blue spray inks
  • black ink pad
  • chalk
  • gold gel pen
  • clear glossy accent varnish
  • 1.5"clear epoxy circle
  • gold alphabet stickers
A Closer Look:
 

Join the Fun!
https://blankpagemuse.blogspot.com/p/creative-challenge-rules.html
Don't forget to share your makes over on the Blank Page Muse Blog for your chance to win a Blank Page Muse gift certificate.  Just follow along with this months challenge theme to participate.  The Challenge rules can be found HERE.
To purchase the stamps to complete this project, visit www.blankpagemuse.com

For more inspiring paper-craft projects from the Design Team, be sure to visit us at

Follow us on Facebook and
Join the Blank Page Muse Fan Group...HERE

To learn more about our designer Karen and see more of her projects
visit her blog...Art & Soul.
Thanks for visiting!

Copyright Text

Blank Page Muse 2018 Sin City Stamps 2013