Showing posts with label angel. Show all posts

Sunday, July 20, 2025

Christmas Angel ~Christmas in July

 Hi everyone, Steph Ackerman here today using some amazing stamps from Blank Page Muse.


Stamp: Avie


Stamp and emboss the image in black ink.
Using Copic markers, color the image.
Using dies, die cut around the image and mat with a larger die cut.


Create a 5 1/2" square card from purple cardstock.
Cut black cardstock 5 1/4" square and the pattern paper at 5 1/8" square.
Ink a wood snowflake and add to the left corner and adhere the stamped image on top.
Finish by adding stickles to the stars.


Use the same sized papers inside.
I left the die cut center blank so I could add a personal sentiment once I decide who is getting this card.

Thanks for stopping by.

Steph

Looking for more Inspiration? Click the links below!
The Blank Page Muse Shop https://blankpagemuse.com/

Monday, December 9, 2019

Angelic Mermaid Ornament

Hi BPM Fans!!

 It's December and Xmas is looming ever closer!!!

Hope you are enjoying our Quick Makes and Xmas ornaments so far this month!

I'm sharing a stamped fabric ornament - it's a little bit fiddly but so worth the effort when you see the end result!


Supplies:
Blank Page Muse Stamp: Kai Lana Mermaid designed by Stephanie Eaton
Scraps Calico Fabric
Brown or Black Ink Pad
Coloured Pencils
Sewing Machine
Stuffing/Hobby Fill
Sparkly flower ornament or puffy wings etc.
Fishing Line
Tools: strong clear glue, scissors, large eye needle, chopstick or poker to push stuffing in! 

Instructions:
Stamp "Kai Lana" onto the calico fabric with the brown ink pad and colour with coloured pencils. Colour to match your Xmas theme!


Layer the stamped coloured fabric piece onto another piece of scrap calico and using your sewing machine sew all around the stamped image (through both layers of fabric) as shown in the photo and trim as shown below.


Next step is to separate the two layers of fabric so you can carefully snip a slit in the back layer. Use this slit to add stuffing and use a chopstick or the like to push into the cavity.


Use your needle and fishing line to make a loop for hanging the ornament.


Use your strong glue to attach the wings. For this project I used the "petals" from some sparkly gold tree ornaments. This step covers the slit in the back of the ornament - saving you from having to sew it up!


Your angelic mermaid is now ready for hanging on your tree! 


Seasons Greetings

Sharon

Don't forget to check us out at all of our social media sites
The Blank Page Muse- https://blankpagemuse.com/

Thursday, June 21, 2018

Mannequin, Clocks, & Roses Card

Hello BPM Fans,
Today's card has a stamped background, as well as, stamped embellishments.  The background was done simply in black & white. Black & white plus one additional color is a great choice for this style of genre.

The key to creating a layered effect is to use the technique called masking. Masking enables you to achieve the effect of one image behind another. Stamp the same image a second time on scratch paper and cut out. Place the mask over the first stamped image which serves to protect it and then stamp a design overlapping it. Part of the image will be on the mask and when removed, you reveal that one image appears behind the other creating a layered look. Take the plunge and create your own distressed vintage masterpiece.

Blank Page Muse Stamps:

http://blankpagemuse.com/birds-clocks-rubber-stamp-set/

http://blankpagemuse.com/mannequin-tags-2-rubber-stamp-set/

Other Supplies:
  • black ink pad
  • pink ink pad
  • sponge applicator
  • clear mounting block
  • paper roses
  • gems 
  • liquid adhesive
  • pearl dimensional paint
  • card base 5x7"
Directions:
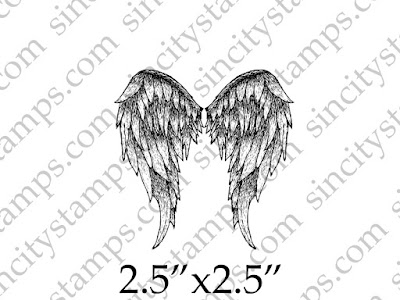
1. Stamp the mannequin image and the set of wings onto white cardstock using black ink. Stamp the rose image twice onto white cardstock once using black ink and once using pink ink. Carefully, cut out all the images and set aside.


2.  Tear the edges of the rose image and apply pink ink.  Mount the pink rose over the intact black image.  Apply pink ink around the edges of the mannequin using a sponge applicator.

3. Use black ink to stamp 3 different size clocks directly onto the distressed card base. Make masks of the clocks on scratch paper, cut them out, and place them over the clock. Next, stamp the script image overlapping the mask to fill in the open spaces between clocks.

(Practice assembling the cluster of elements but do not adhere them yet.)

4. Tie a faux bow with pink organza ribbon and attach it vertically on the left side of the rose embellishment adhering the tails to the backside.  Add 2 clocks behind the stamped embellishments and assemble the cluster of elements but do not adhere them.  Add small accent words to the background by stamping them with black ink.


5. Adhere all the main elements in the center of the card to create a cluster. All elements should be touching and/or overlapping to create interest and added depth.  Embellish with paper roses (1 large & 3 small) and a selection of small daisies. Adhere gems to the centers of the daisies. Use dimensional paint to create faux pearls and add a generous scattering of random clustered dots.


A Closer Look:


To purchase the stamps to complete this project, visit www.blankpagemuse.com

Apply coupon code
"Summer2018Karen"
during checkout to Save 15%
off each stamp from Blank Page Muse.
Valid until August 31, 2018 (midnight - Pacific Time)

For more inspiring paper-craft projects from the Design Team, be sure to visit us at
The Blank Page Muse Blog

Follow us on Facebook.
Join the Blank Page Muse Fan Group. HERE
Learn more about our designer Karen at Art & Soul.

Join Us in the NEW Monthly Creative Challenge

Come checkout the Blank Page Muse Creative Challenge. This month's theme is the technique "Let's Go to the Beach." Create a new project following the theme and add it via the Inlinkz linky tool. There will be a random drawing prize for a Blank Page Muse Gift Certificate. You can find all the guidelines HERE.

Thanks for visiting!

Thursday, December 14, 2017

Angel Ornament

Hi gang,

The project for today is a Christmas ornament. Yes I made an ornament using the Phoebe Art Doll Rubber Stamp Set from Sin City Stamps. I knew the moment I saw this stamp that I wanted to make it into an ornament for my tree.

Supplies:

Other Supplies:
  Copic Markers
  Sentiment die cut
  Angel wings die cuts
  Gold twine 


Step 1: Die cut the three layers of the angel wings.


Step 2:  Using Copic markers in shades of gray, I colored the wings.


Step 3:  I assembled the wings using foam tape to add dimension to the wings.


Step 4:  I stamped the Phoebe Art Doll and cut her out.  I colored the stamp using Copic markers.


Step 5:  Next the wings were attached to the back of the angel in a manner to show flight.


Step 6:  The final step was to attach a piece of gold twine to the backside of the ornament for the hanger.


My Christmas Angel using Sin City Stamps!  Isn't she lovely?


Please share your creations with us at Sin City Facebook Fan Page.  We would love to see what you have made.

X

Wednesday, November 29, 2017

Steampunk Christmas Angel


Hello all, Monique here showing you how to make this steampunk angel decoration for Christmas.!

Supply list:
  1. Sin City stamps : Crackle Background stamp,
  2.  Angel Feathered Wings heart shaped stamp , 
  3. Small Cogs and Gears steampunk stamp,  
  4. 1923 numerals rubber stamp 
  5. Octopus Time sheet .(The "lady" and the "steampunk" word)
  6. Angels Fly on the wings of love phrase word stamp
  • Photo frame 
  • Cardstock in white
  • Inks in browns and black
  • Versa-mark ink
  • Scissors

Step 1: Take the glass out of the frame and use is it to measure the size of the cardstock.
Draw around the glass using pencil and cut the cardstock to size.
Step 2: Use inks in browns to create an aged look on the white cardstock
Step 3: Make an impression with the crackle stamp using versa-mark. This will react with the other  inks and give a subtle crackle look.


Step 4: Spritz some water drops onto the cardstock to age it.
Step 5: Stamp the octopus lady using black stamp ink.
Step 6: Make a mask and cover the Octopus lady
Step 7: Stamp the wings over the masked Octopus lady. and then the gears onto the background
step 8: Stamp the sentiment  ( the Steampunk word and Angels Fly on the wings of love phrase word stampon a piece of cardstock that has been colored using ink.
Step 9: Cut the words out just use the word "angel"of the Angels Fly on the wings of love phrase word stamp, Ink the edges using black distress and adhere on the picture creating the word "Steampunk Angel).

Step 10: Use an alphabet stamp to make the word Christmas and stamp 1923 in the upper left corner.


To purchase these supplies, visit www.sincitystamps.com

Sin City Stamps Blog

    Follow us on Facebook
Join the Sin City Fan Group. HERE 

Thanks for visiting.

Copyright Text

Blank Page Muse 2018 Sin City Stamps 2013