Showing posts with label Envelope Art. Show all posts

Tuesday, May 25, 2021

Budget Friendly Envelope

You don't need endless supple of expensive craft items to enjoy stamps and other paper crafts. I went to Dollar Tree and picked up a few things. My Dollar Tree is well stocked with craft items. I even found this washi tape. The tape is a little more on the plastic side but if you want it to stick to your projects better add a little Tacky glue. 


Stencil used:

Additional items needed:
  • Imagination
  • washi tape
  • Acrylic paint
  • Envelopes
  • Sponges

  1. If your envelope has a window like mine, add a little washi tape to protect it from paint. 
  2. Then add a little tape to the edges of your stencil so it doesn't move when you sponge your paint to the envelope                                                                                                                                                                      

  3. Have fun this part is a bit messy. I also took my sponge and ran it along the edge of the envelope to give it a little more color.


Hope you enjoyed this budget friendly envelope. Everything but the stencil was from Dollar Tree. If you have any questions feel free to message Lasheet and if you choose to make your postcard tag her and Blank Page Muse. Thank you, happy crafting!! ♥


Looking for more Inspiration? Click the links below!
The Blank Page Muse Shop https://blankpagemuse.com/


Sunday, July 21, 2019

Tri-Fold and Seal Stationary

Hello!  Susie here with another Snail Mail project!

Did you ever have a pen pal? My cousin Rebecca was my pen pal for a while when I was a tween and I distinctly remember the stationary I used.  It was a tri-fold that you wrote on one side and then closed and sealed to mail.  It was more than a postcard but less than a card & envelope set.  It brings back happy memories that I want to recreate today.

Time to play...


Supplies:
Flower on Stem Art Rubber Stamp my Terri Sproul SC0033-10
Watercolor paper
Permanent, waterproof black ink- Ranger Archival was used for this project
Pigment inks - ColorBox Blends from Clearsnap were used for this project
Paintbrush
Water
Purple Tape
Stamping platform
Scoreboard
Craft mat

Begin with a piece of watercolor paper that measures 8.5"x 5.5". Score it along the long edge @ 2.5" and at 6.5" creating 3 sections. The middle section becomes the front of the tri-fold stationary. Then add a 2.75" piece of  the purple tape where the address would go.


Place it on the stamping platform with the 2.5" section at the bottom and positioned the flower stamp so that it would slightly overlap the Purple Tape. Stamp with black waterproof permanent ink.


Next stamp the flower on a separate piece of paper and trim this out so that it can be used as a mask.  Once it was in position, cover the front of the tri-fold with a light application of Golden ink, using a pouncing motion and an applicator to create a mottled coverage.
 Before removing the mask and the tape, ink around the edge of the tape to create a more solid border for the address box.


Watercolor the flower with Melon, Frog and Leaf inks.
 I love this flower stamp!  It is such a beautiful image of a dogwood flower!


I also inked along the edges and the score lines before folding it up and adding a seal.
  (Do you recognize the faux postage stamp I shared in my last post?)


And that is all there is to it!  A quick and easy idea to build up your stationary reserves!  I like to use watercolor paper but this could just as easily have been created using any cardstock.  You can get (2) tri-folds out of each standard piece of 8.5"x11" cardstock.  And don't forget to create some coordinating seals to use!

Thanks for stopping by and I hope you find some time to play today!
Susie


Looking for more inspiration?
Click the links below!


Friday, July 5, 2019

Envelope Mail Art

Welcome to our first Fan Art Friday!
This months theme is Mail Art and to start the month off right, we are sharing 2 creative envelope making idea's from our past, way back when we used to be called Sin City Stamps.
Click the links below each photo for the tutorial. 
Enjoy! And don't forget to join our Face Book Fan Group where you can share your fan art too!


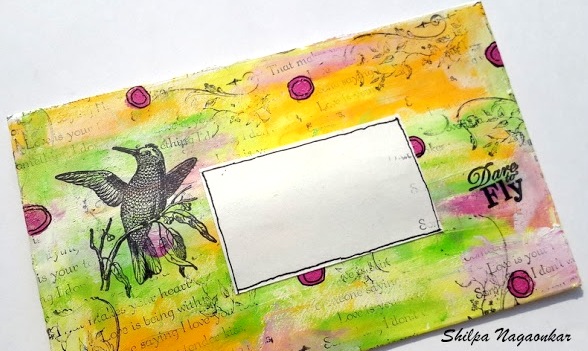
By Shilpa


By: Barbara 


For more BPM Inspiration, please visit the following....
The Blank Page Muse- https://blankpagemuse.com/

Wednesday, July 3, 2019

Hello Llama!

 Our DT Member Sharon has created these fabulous decorated envelopes which are perfect for you to use in your crafty swaps or regular snail mail letters!
Who doesn't love to receive a colorful stamped envelope in the mail? Especially when envelopes are so quick and easy to "adorn" there is no excuse for sending boring snail mail ever again!
 Sharon used blobs of paint and an old gift card to cover the envelope background then embossing ink and black embossing powder to stamp the images.
She used stamps from the Happy Day Llama Set by Pam Bray on the long envelope and a little flower from the Petals and Flowers Set by Michelle Frae Cummings.
The great thing about decorating envelopes is you can use any of your Blank Page Muse Stamps!!!
We hope you feel inspired to have a go!

Don't forget to check us out at all of our social media "haunts"!!!
The Blank Page Muse- https://blankpagemuse.com/

Saturday, June 29, 2019

A Boho Woman's Mail Art!

Hello BPM Stampers!!! 
I'm back for another creative make to finish off the month!

Today I've decorated an envelope and it's nice & quick & easy so no excuses for not having a go!
A perfect way to send your postcards that you may have played along with this month here at the blog!
Supplies:
Blank Page Muse Stamps: Boho Celestial Star Girl
Envelope - any size
Chalk Paints & White Gesso
Black Archival Ink Pad & Distress Ink Pad
Markers/Pencils/Smooch Metallic Paint etc.
Spatula
Instructions:
Start with an envelope of your choice and use a spatula to "smear" different colour chalk paints - cover the front and back if you like!

Before stamping the main image use the spatula to smear a thin layer of Gesso to the bottom left corner to dull the coloured paint and allow the image to be more prominent. Allow to dry before stamping! Use the Black Archival Ink and stamp the Boho girl in the bottom corner.


Use the Distress ink in a soft tone to stamp one of the "flowers" from the Petals & Flowers stamp set to form a border around the edge of the envelope. You can do the same to the back of the envelope as well if you like! Use a few markers to highlight some of the stamped Boho Girl along with some metallic "Smooch" to highlight her jewellery. Allow to dry.


Hope you enjoy!
Sharon
Don't forget to check us out at all of our social media "haunts"!!!
The Blank Page Muse- https://blankpagemuse.com/

Tuesday, December 5, 2017

Happy Birthday Envelope Art

 Hi Michelle here with a envelope art quick idea!
Its my nephews Birthday this month so I wanted to make his card little bit 'extra-special' with some envelope art!

I used this stamp from the Sending Smiles Whimsical Mail Art collection by Rick St. Dennis MFA.
How cute is that jester?

 I stamped the image onto the front of a plain envelope and colored in with fine tipped markers. 


I personalized the rest with some hand lettering.

Do you think he'll like this?
I know I would!
Be sure to visit our Fan Page to see more idea's and share your own!


Copyright Text

Blank Page Muse 2018 Sin City Stamps 2013