Monday, May 19, 2014

"Beautiful Things In Small Packages"~ By WildHeart Art~ featuring Green Sneakers and Sin City Stamps


"Beautiful Things in Small Packages"
By WildHeart Art
 Featuring  Green Sneakers & Sin City Stamps

I love the romantic mindset where beautiful gifts are handmade and creative expressions of love given freely. Gone by the wayside is the art of creating lovely mail for someone special. Mainly because of the fact that we all live in an era where fast and immediate is the preferred way of receiving items. Sometimes the best and most precious things come in small packages! I was thrilled to find this fun and easy way of  creating envelopes with Kreate- a- Lope (by Green Sneakers)! You basically follow the directions and fold and cut and then the really fun part comes with the decorating! Just imagine receiving a  beautiful hand crafted envelope such as this!

~Supplies~
Sizzix Machine
Sizzix Dies
 Full sheets of Collage paper for envelopes
Glue for sealing the envelope
Archival Stamp Pad in Sepia
Glitter glue
Acrylic paint
 Pitt Pen Marker-Purple

Start by using the Kreate-a-Lope template and collage papers and follow directions for creating the envelope.


Now time to put the design onto the envelope with the Sizzix Machine and dies.


Place the paper into the folded dies and use the Sizzix machine as directed. You now have some beautiful raised patterns on your envelopes!


It is now time to decorate these beauties!
I used a Pitt pen to write the word "Life" on the side of the purple envelope and touched upon the raised areas with the Dew Drop Gold stamp pad.
I then stamped the butterflies down the left side and added some dots on the wings with acrylic paint and some glitter glue. The saying "Wings of love" on  are stamped on the back.


For the beige envelope I decided to use the Archival stamp pad in Sepia and highlighted the raised areas and for a bit more color I used dots of acrylic ink in turquoise blue.


I loved creating these  pretty envelopes, they were  so easy and you can be as creative as you would like with them!
Everyone loves to feel special and these most definitely ,when received in the mail...  
 will make someone feel very special!
Enjoy!
~In Love and Faith~
Sherri

Thursday, May 15, 2014

Coupon Envelope Book

Happy Friday, everyone.  I hope you are ready for the weekend.  Barbara here, and I have some fun envelope inspiration for you today using Sin City Stamps and one of the wonderful envelope templates from Green Sneakers, our co-sponsor this month.  I decided to make a little coupon book to carry in my purse.

Envelope 1 - Cover
Supplies Used:

Sin City Stamps:  Time; Dressforms; Wing-It

Green Sneakers:  PL4x6 Kreate-a-lope Envelope Template

Printed scrapbook papers

Black ink pad

Binding machine and o-wire

To make the envelopes for my book, I first followed the directions on the template, or here is a link to a short video on how easy it is to use these templates.  I lined up the template with the edge of a piece of 12"x12" paper and cut around the edges.

I selected five coordinating sheets and cut each one out.

Fold all sides around envelope template.

Trim corners to eliminate bulk.

Glue top flap down first.  This will act as an envelope liner.

Fold in both sides next.

Fold up bottom flap and adhere to sides.

Here are my five envelopes which I made in just a matter of minutes with this wonderful template.  I have laid them out in the order I want to bind them together.  NOTE:  While the first four envelopes have the opening facing to the left, the last envelope (far right) is turned with the opening facing to the right.  This allows for the pocket to remain inside, but provide a back cover at the same time.

The cover envelope (photo above) was stamped using the   Dressform image from the Dressform plate.  I computer generated "COUPONS" onto a scrap of print paper and adhered to the right side.

Stamp corset, lace border, and "Live, Laugh, Love" from the Dressform plate onto scraps of print paper.  Fussy cut lace and corset.  Punch words with oval punch.  Adhere as shown.

Envelopes 1 and 2
Stamp gears background, Time clock face, small clock face from Time stamp plate onto envelope and scraps of print paper.  Fussy cut images and adhere, as shown.

Envelopes 2 and 3
Stamp flourish ornament, angel banner, and Antique-aholic from the Wing-It plate onto scraps of print paper, fussy cut and adhere, as shown.
Envelopes 3 and 4
Envelopes 4 and 5
Stamp clock balloon and clock hands from Time stamp plate onto envelope.  Stamp clock balloon again onto scrap print paper, fussy cut clock face only and adhere over stamped image.

Back Cover - Envelope 5
I bound all envelopes together with a binding machine and an O-wire.  Follow directions with your machine to do this.  If you do not have a binding machine, you can always bind it together with some pretty ribbon.

There you have it, your very own, beautifully decorated, coupon holder to wow everyone at the grocery store.  Imagine all the possibilities for this little gem.  Not only is it perfect for holding coupons, but you could turn it into a brag book with your favorite photos, a little book to hold receipts, or just turn it into an altered book that holds tags and your favorite images.  The possibilities are endless.  With the stamps from Sin City Stamps and Green Sneakers fabulous templates, it will make this project so simple to complete.

I hope you will visit the Sin City Stamps blog for more inspiration from the design team, and be sure to stop by the online shop for all your stamping needs.  In addition, Green Sneakers has a variety of templates to use for your paper crafting needs, so I hope you will visit them, too.

Thanks for stopping by, and have a wonderful, creative weekend.

Barbara
http://blackholeartstudio.blogspot.com

Wednesday, May 14, 2014

No Thank you Cards… No Problem - thanks to Kreate-A-Lope

Hi all Lisa here.  Very excited about this months Cross Promotion Green Sneakers

We had a last minute mini-birthday get together for my son and his friends.  
My baby is growing up - 14…


I wanted to get thank you cards out to his friends for his gifts.

Of course I didn't have any thank you cards….   what to do..

Sin City Stamps to the rescue….
In my goody package was this card template. - and this month cross promotion.

Now you know how new things scare me so of course I put it to the side of my desk.

Then… enters… You Tube.
Green Sneakers has a cute youtube video

They make it look so easy….. No way it can be this easy… right?

So here's the process  I pulled out different patterned paper (used whatever you like)


You put the template right on the paper - and just pull to tear.


And magic….   it's so simple..   I don't tear very well - so I did use scissor to trim - HINT:  If you hold down "a bit firm" it teared the paper clean.  By the last one I had it down perfect.


Then you just fold it over…   I didn't even use a bone folder it really is that easy.


Put a little glue on it - and the envelop is made…  I keep saying this - but it's that easy...


Then pulled out my favorite sin city stamps… 


Below are different versions…  Did some hand drawing inside some of them.


Now the next step I did..  I used the "window" template and teared off that side for the "card".


More cards/envelops


Here's the 4 cards I made.


The Envelops


I hope you enjoy… please go out and get this template - it's super easy - and for that last minute card - or invitations nothing better than a hand made for that extra special touch.

Products Used:

Kreate-A-Lope - Green Sneaker
Ranger - Tim Holtz Distress Ink - Black Soot
Washi Tape
Prima Chalk Ink
Sharpie
Sin City Stamps - Classic Spark  ** This is a must have!!!
Play Color - Instand Educa - Black


Monday, May 12, 2014

Stuff THIS Envelope!

Hey, there!  This is Robin Redd, (a.k.a. RockinReddRobin!)  

 I’m here to share with you the Envelope Template from Green Sneakers.

I made a few different ones so you can see some versatility you can get from using the template,
 this, along with all the other Sin City Stamps Design Team member’s ideas. 
I used a square paper doily for my first sample.   
This, just so happen to be the same exact size as the template 
so I didn’t have to trim it down to size.
I placed the center piece of the template down and folded in the sides.
Don’t you love this elegant look?!


I made a pretty “Love” card to go inside using the stamp from the Wildlife stamp set.
I used black embossing powder for the word, Love.
This is an old trick I’ve used for years.   
Normally, I would pick a pretty picture from a magazine, 
line a seascape or garden scape and make an envelope.   
But I found these large images make a striking statement on your envelope.

 
I used a piece of a Project Life card for an address label.  Any blank label will work.
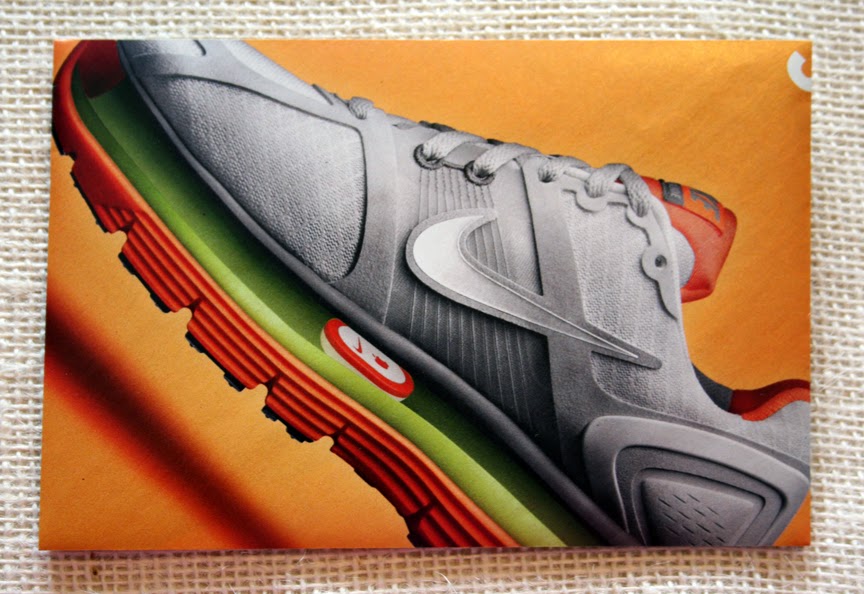
Here is another envelope with the large image from a magazine.  
 I’m centering the portion of the ad that I want on the front of the envelope.


 I love this one, too.  
 I used a piece of sketch paper from a sketch pad, 
torn out the envelope and dry embossed the flap of the envelope. 
  
You can cut out the envelope, 
but I like the way Green Sneakers shows how the template is made to use with NO scissors. 
  
The torn edges really add elegance to this envelope.
Watch the Green Sneakers video to see 
how we make these envelopes with no scissors.  Pretty tricky!  
With this envelope, I used a page from a large book.   
I stamped the wild life scene from the Wildlife stamp set. 
I colored the stamped image in with Prisma Color Colored Pencils.  
 I framed it with a white Sharpee pen.
 
I hope I’ve inspired you to create something today!

Until next time…


Copyright Text

Blank Page Muse 2018 Sin City Stamps 2013