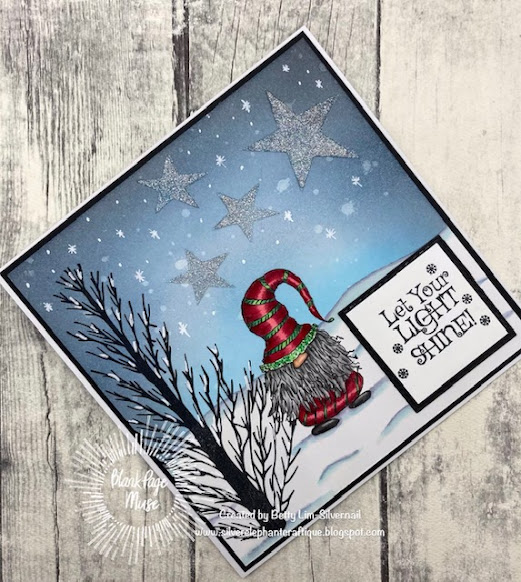
Greetings BPM Fans! Did you know that gnomes are a symbol of good luck? Farmers still use them today to watch over livestock and crops. They place gnomes in the rafters of the barn or put them in their gardens. I just think they are so cute. Just check out this adorable one from Blank Page Muse called StarBright Gnome Wintery Tree Let Your Light Shine by Pam Bray. This stamp set comes with a 5" tree and the sentiment, Let Your Light Shine. I colored him in red and green colors for a winter card, but you can color him any color and add leaves on the trees for any occasion card or project.
I hope this card inspires you to enter the Blank Page Muse December Challenge, "Celebrate!" You can turn this card into one for any festive occasion. This is a really fun card to make! Visit the BPM Blog for details.
- Blank Page Muse stamps: Gnome Starbright set
- Blank Page Muse stencil: Stars
- White cardstock cut to 12"W x 6"H, scored at 6", folded in half. This is the base card.
- Black cardstock cut to 5-7/8"W x 5-7/8"H for the mat.
- White bristol or watercolor paper cut to 5-3/4"W x 5-3/4"H.
- White cardstock for the sentiment
- Black cardstock to mat the sentiment
- Distress ink: Tumbled Glass, Stormy Sky, Faded Jeans, Black Soot
- Ink blending tools
- Water & paint brush or water spritzer
- Art Masking tape. I use Eclipse Art Masking Tape.
- Black ink pad
- White gel pen
- Coloring medium of choice. I used Copic markers.
- Transparent texture paste. I used Ranger Texture Paste/Transparent Gloss.
- Silver glitter - fine or extra fine
- Palette knife to apply texture paste
- Paper trimmer
- Scissors
- Using the bristol or watercolor paper, stamp the gnome toward the bottom of the paper.
- The gnome will need to be masked so that when the tree is stamped, a few of the branches will appear to be behind the gnome. Place a small piece of masking paper onto bond paper and stamp the gnome. Using scissors, cut out the gnome.
- Color the gnome with your favorite coloring medium
- After coloring the gnome, adhere the gnome and snow masks
- Using your blending tool and distress inks, ink blend the sky. use the lighter colors towards the gnome and darker colors towards the edges and corners.
- Spritz water onto the sky area making sure there are some "stars" of different sizes.
- Remove the snow mask, but leave the one on the gnome in tact.
- Tape the stencil onto the card then use the palette knife to spread a thin layer of texture paste. Lift off the stencil carefully. Let dry until before adding the big star.
- Stamp the sentiment, trim to size. Cut a mat using black cardstock.
- Adhere the mat and sentiment to the card front.
- Adhere the card front to the black mat.
- Adhere the black mat onto the base card.
- Using a white gel pen, add a few snowflakes in the sky and on the tree. the card is complete!


No comments:
Post a Comment
Thank you for visiting and leaving your kind words!
~~~
A note regarding the GDPR and EU ePrivacy Regulation:
Those leaving a comment on any post on this blog do so on the understanding that their name and personal details will be visible to anyone who visits this blog.
People entering a piece of artwork into any competition or giveaway promoted here, they do so in the knowledge that their name and blog link are visible to all who visit this blog and in so doing have published their own personal details and consented to our use of that personal information should it be selected as a winner.
Thank you.