Pages

Pages

Tuesday, December 31, 2019

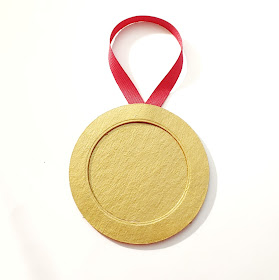
First Christmas Together Ornament

Hello!  Susie on the blog today with a Quick Idea for a "First Christmas Together" ornament.

All the ornaments on my Christmas tree remind me of events and people in my life.  Decorating my tree every year is like a walk down Memory Lane. I love to reminisce with my husband and children as we "deck the halls".  I also like to give ornaments that commemorate special events: a graduation, a new home, a new baby or...a First Christmas Together!

Time to play...


Supplies:
Lady & Man Clock with Writing Art Rubber Stamp
Clearsnap ColorBox Blends Inks
Archival Ink, black
Embossing ink
Embossing powder, black & clear holographic
Decorative circle die
Metallic gold cardstock
Metallic gold marker
Want2Scrap Baby Bling, black & clear rhinestones

Directions:
  • Stamp and heat emboss the image with black ink and embossing powder.


  • Color image as desired and protect with a layer of clear embossing powder. 
  • Cut out the image and adhere to decorative background. (I used a Spellbinder's die cut, but you could actually use a store bought doily - they come in lots of different colors and finishes.)


  • Add sparkle and texture around the edge with self adhesive rhinestone bling!


  • Optional:  write on the back with names, dates and personal note.


Happy New Year and thank you for stopping by!  I hope you find some time to play today!
Susie

Looking for more inspiration?
Click the links below!

Sunday, December 29, 2019

Mermaid Chunky Dunk


Greetings to all of you in mermaid land!  Kai Lana & Friends Mermaid Jellyfish Starfish Art Rubber Stamps designed by Stephanie Eaton are a perfect reminder that after the holiday we can all embrace our inner mermaid *wink*.

Supplies needed
 Kai Lana & Friends Mermaid Jellyfish Starfish Art Rubber Stamps designed by Stephanie Eaton
Ink -blue, green, black
Ocean-y patterned paper
white card stock
markers or other preferred coloring device


Starting off with a ocean-y patterned paper, stamp the sea weeds and plant from the   Kai Lana & Friends Mermaid Jellyfish Starfish Art Rubber Stamps designed by Stephanie Eaton.


Stamp mermaid and greetings onto white cardstock and fussy cut. Color mermaid as desired. Add to card to finish. 

Be sure to follow us

The Blank Page Muse- https://blankpagemuse.com/


Saturday, December 28, 2019

Bear on Sled Holiday Ornament

Hello, hello. Samantha here with the second style of holiday ornament to share with you.
Be sure to use code BPMDtSamantha2019 to save 15% off of your next order!


To begin you will need:

Use hot glue to adhere your ribbon to your circle. Glue the frame over top.


Use glue and shaped glitter to create the look of snow along the bottom third of the ornament.


Stamp the sledding bear on white cardstock, color and fussy cut out.


Place foam adhesive to the back of the fussy cut image and attach to the ornament.


That's all! Easy and cute.
Thank you so much for stopping by. Make sure you head on over to the BPM Facebook Fan Group to share what you were inspired to create.
Until next time,
Samantha

Looking for more inspiration?
Click the links below!

The Blank Page Muse Shop

Facebook Fan Page

Instagram- Shop

Instagram- Blog

Twitter

Pinterest

Thursday, December 26, 2019

Two Hearts One Love

Hi Blank Page Muse Fans!

Hope everyone had a fab day yesterday for Xmas - maybe some of you are still celebrating???

I decided to finish the year off with a creation not related to Xmas but perhaps new beginnings for 2020


This is a great card for making up quickly - perfect for an engagement or wedding - nice and romantic!


Supplies:
Pre Cut Patterned Window Card OR Make Your Own with Patterned Card and a Square Punch
Cream Coloured Card
Black Archival Ink
Embellishments
Scissors, double sided tape, glue

Instructions:
Start by stamping your BPM stamps onto some cream coloured card with black archival ink and fussy cut the birds and bird cage. The phrase will be placed behind the card front window so stamp onto a piece or card large enough to fit behind the window.


Use double sided tape to attach the phrase behind the card front window. Arrange the other stamps and your embellishments on the card front and adhere.


A perfect card which you can adapt to suit any occasion!

Thanks for joining me today!

Wishing you all a very festive season and a happy new year which is just around the corner!

Happy stamping!

Sharon

Don't forget to check us out at all of our social media sites
The Blank Page Muse- https://blankpagemuse.com/

Tuesday, December 24, 2019

Christmas Planner Pages

Hi everyone! It's me Tonya! Tomorrow is the big day! Are you ready for Christmas? I am barely. 😉  But I did have time to work in my travelers notebook for this weeks before the pen planner pages using an assortments of stamps from Blank Page Muse.


I started by inking several of the Angel Art Classic Style Flourishes Stamps with green ink and stamping onto a piece of Watercolor Paper.


I cut numbers to corresponded with the days of the week for my pages using the Numbers Cut and Emboss Diecuts. I inked the edges of the numbers with a red ink and adhered to each page. I stamped the package from the Country Vintage Christmas Stamp Sheet by Pam Bray and the ornament from the Small Fancy Holiday Ornament Rubber Stamp onto watercolor paper, painted with different inks, fussy cut each out and adhered to each page.


The Santa is from the Steampunk'd Christmas Holiday Stamp Sheet I completed the same steps as I did for the present and ornament on the pages before. I used leftover scraps from the numbers to cut out holly and I added red flatback pearls to create berries. 


Also from my stash I added an ornament, Christmas sentiment to the page and a yellow glossy dot to the ornament that the Santa is holding. I added glitter glue to the Santa's hat and outfit.


The Saturday and Sunday pages I inked and stamped the Mini Mandala Snowflakes Art Rubber Stamps onto watercolor paper, punched out each with a circle punch, adhered to each day and added a tiny bit of glitter glue to the center of each snowflake. There you have it my planner pages before the pen. Be sure to hop on over to their website, which can be found HERE, and pick these stamps and supplies for your next project.
As always if you have questions about this project please let me know. Also if you aren't following Blank Page Muse on their other social medias you can find them on: 


Supplies 

Various Inks
Beacon Adhesive: Zip Dry Adhesive 
Red Flatback Pearls
Yellow Glossy Dot
Clear Glitter Glue
Circle Punch

(Products listed above are Affiliated Links for your convenience)


Thanks for stopping by, hope your Tuesday and Christmas Eve is wonderful and enjoy creating!


Monday, December 23, 2019

Wood Slice Christmas Ornaments

Hello! Glad you came by the Blank Page Muse Blog today. Kelly has some wood slice ornaments to show you and they are super cute and quick to make! They can be used on packages like a tag or ornament.


Country Vintage Christmas stamp set by Pam Bray was used to create these ornaments along with Tombow markers, Stickles, white gel pen, VersaFine Clair Ink, ribbon, and bakers twine.

Using the dove, Santa, and snowman stamps and VersaFine Clair ink in Nocturne, stamp the images directly on the wood slice.


Then using the Tombow markers and white gel pen, color the images in your choice of colors.


When you are finished coloring the images, use the Stickles add glitter to the ornaments then drill a hole in the top of each ornament and add the ribbon or twine.


These make great teacher gifts too!!

Make sure to check out our links and connect with us.

The Blank Page Muse- https://blankpagemuse.com/


Sunday, December 22, 2019

Mermaid Mini Christmas Tree Ornament

Hello!  Susie on the blog today with a mermaid themed mini Christmas tree ornament.

I am a fan of mini Christmas trees and shrink plastic is the perfect way to create homemade ornaments for them!  I also like Christmas trees with themes, and since I grew up near the beach and love scuba diving and the ocean, it really is no surprise that I reached for a mermaid stamp, is it?

Time to play...


Supplies:
The Femmes Mermaid Ocean Scene Large Rubber Stamp
Shrink Plastic
Archival Ink, black
Stamping platform
Sharpie markers
Crop A Dile
Beads
Jute

Directions:
  • Stamp image onto shrink plastic using permanent black ink.
  • Use permanent markers to color on the reverse side of the image. (I used Sharpies - so many colors and you can buy them everywhere!) 
  • Punch holes as desired and then bake according to the manufacturer's instructions. 
  • Add sparkle and texture with beads and a tassel. 

What kind of a themed tree do you want to create?  Your stamps probably reflect your interests - I think I feel a cat ornament coming on...

Thanks for stopping by and I hope you find some time to play today!
Susie

Looking for more inspiration?
Click the links below!

Wednesday, December 18, 2019

Crafting Christmas Ornaments with the Kids!

Hello!  Susie on the blog today and I have a couple of quick and easy Christmas ornaments to share with you today!

Our theme this month is 3D Holiday Ornaments - with *SPARKLE*!
One of our family traditions over the years has been to make Christmas ornaments with the kids.  They need to be fast and easy, but also allow for individual creative input.  Head on over to the local craft store and pick up a couple of those inexpensive plastic ornaments - the ones that pull apart so you can fill them - and pull out your winter themed stamps!

Time to play...


Supplies:
Child Riding a Sled Winter Line Art Rubber Stamp
Two Children Riding a Sled Winter Fun Rubber Stamp
Plastic Ornaments
Acetate Sheet
Archival ink, black
Stamping platform
Sharpie Markers
Spray adhesive
Silver Glitter
Faux snow
Washi tape


Directions:

  • Stamp on acetate with permanent black ink.  I recommend using a stamping platform for this as it minimizes the possibility of smears.


  • After the ink dries, color on the back side of the design with permanent ink markers. (I used Sharpies - they come in so many colors now!)


  • When you are finished cut the acetate to fit inside the ornament. (They usually come with a template just for this purpose!) 


  • Place your stamped image inside the ornament and seal it up with some sparkly faux snow!


And here it is on the tree!


Using the same basic idea I created a slightly different style ornament.


  •  Stamp image on acetate with permanent black ink, color and cut to size.


  • Protect the edges of the back side of the ornament with tape.


  • Spray the inside of the back half of the ornament with adhesive and then quickly add glitter. Tap out the excess and wait for it to dry.  (It just takes a few minutes!)


  • Remove the protective tape, add the stamped image and the sparkly faux snow before sealing it up.


It adds all kinds of sparkle and shine to your tree!


These are easy enough to be made with kids of all ages, although it is always a good idea to supervise the young ones when glitter is involved! The best part is that when they are done, you can use the Sharpie markers to personalize the outside of the plastic ornaments with the date and name of your young artist! You can add a new design every year!

Thanks for stopping by and I hope you find some time to play today!
Susie

Looking for more inspiration?
Click the links below!

Monday, December 16, 2019

Snow Globe Holiday Ornament

Holiday Greeting to you!   I love snow globes and couldn't wait to try my hand at creating a shaker box ornament.

Supplies Needed

Snow Globe Shaker Box 
Crop a dile or hole punch 
Ink- embossing, Black
Gold Embossing Powder
Glimmer Mist
Glitter


Start by stamping and embossing flourish from Blank Page Muse Art Journaling #2 Rubber Stamp Set by Terri Sproul onto snow globe. Emboss with gold embossing powder.  Spray with Glimmer Mist.
While drying, stamp Blank Page Muse Penguins on Ice Winter Holiday Rubber Stamp Sheet  onto card stock and color as desired. Adhere to snow globe base. Adhere inner pieces of shadow box, punching a hole for holder in top of each piece. 

Add glitter then transparency. Finish with dry shaker top.  You can see how "snowy" the inside of my globe is.


Finish ornament with bow and tie.


Be sure to follow us

The Blank Page Muse- https://blankpagemuse.com/