
Hi Gals,
Ok...so it's confession time. This card is one of my first real attempts at the style known as Steampunk. I especially enjoyed all the embellishing and had lots of fun making it.
I hope you enjoy my super feminine Steampunk card full of lace, gems, candles, & gears!
1. Dress Forms Steampunk Rubber Stamp Set (Sin City Stamps)
2. black cardstock
3. watermark ink pad
4. purple ink & permanent purple pen
5. silver embossing powder & heat gun
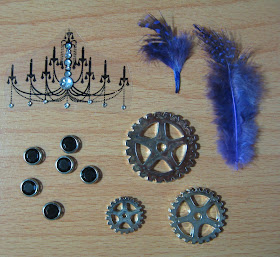
6. gear embellishments
7. acetate & permanent black ink pad
8. chipboard frame
9. silver acrylic paint & silver gel pen
10. black & silver rhinestones
11. black lace, black tulle, & silver cord
12. orange glitter glue
Directions:
1. Stamp the dress form image using watermark ink onto black paper. Apply silver embossing powder and heat set. Stamp the corset again, emboss, and fussy cut. Use a permanent marker to color just the corset purple and attach with dimensional foam tape over the complete image.


2. Apply silver acrylic paint to a chipboard frame and set aside to dry.

3. Stamp the corset ribbon image randomly over the background paper using purple ink and set aside to dry. Adhere black lace to the back of the frame and then add a layer of white cardstock to contrast against the lace. Adhere the frame to the background paper.


5. Use permanent black ink to stamp the chandelier onto a piece of acetate. When the image is dry carefully trim it. Embellish the chandelier with silver rhinestones. Then apply orange glitter glue to the flames of the candles and set aside to dry.


6. Attach a piece of silver cord to the back of the chandelier so that it will hang freely. Place the cord along the top left corner so that the chandelier hangs slightly overlapping the frame. Next, adhere the cord to the backside. Finally, embellish the card with rhinestones, feathers, and a cluster of gears. Adhere the finished design to a purple card base leaving a narrow border.

7. To accentuate the lacing design on the background paper and make it stand out, use a silver gel pen to draw the eyelets around the ribbon lacing.
A Closer Look:


To purchase this wonderful dress form image, visit www.sincitystamps.com
For more inspiring paper-craft projects from the Design Team, be sure to visit us at
the Sin City Blog and follow us on Facebook.
To share your creations, join our Sin City Stamps Fan Page HERE.
To learn more about our designer Karen, please visit her blog, Art & Soul.
Thanks for visiting!
No comments:
Post a Comment
Thank you for visiting and leaving your kind words!
~~~
A note regarding the GDPR and EU ePrivacy Regulation:
Those leaving a comment on any post on this blog do so on the understanding that their name and personal details will be visible to anyone who visits this blog.
People entering a piece of artwork into any competition or giveaway promoted here, they do so in the knowledge that their name and blog link are visible to all who visit this blog and in so doing have published their own personal details and consented to our use of that personal information should it be selected as a winner.
Thank you.