Welcome to the Blank Page Muse Blog! We hope you love these amazing projects created by our fabulous Creative Stamping Team. At Blank Page Muse, we are proud to offer red rubber stamps, clear stamps and stencils. I Brake for Stamps rubber stamps are available online in the same shop. Art rubber stamps are pressed to order in the USA. We are here to help break that blank page! Visit our sister shop IBRAKEFORSTAMPS.com
Pages
Pages
Friday, September 30, 2022
Dec 25!
Thursday, September 22, 2022
Oh Bountiful Season!
Hi everyone, Steph Ackerman here!
Sunday, September 18, 2022
More Stencil Butters & Projects
Hello again from design team member, Heidi!
I am making more projects with the Stencil Butters that are available in the Blank Page Muse store. Part of this post will be me playing around with them and then I will use a couple of the backgrounds for projects.
The first thing I did was to stencil over some of the Pam Bray patterned papers. These papers are definitely thick enough to stand up to the stencil paste. I really liked the nice opaque coverage.
I hope this gave you and idea of some different ways to use your stencil butters! I will be back with more ideas another day. Right now, I ‘d better go clean off my craft desk! Have a great day!
You can also find more inspiration at the links below:
The Blank Page Muse- https://blankpagemuse.com/
FB Fan Page- https://www.facebook.com/groups/blankpagemuse/
Instagram Shop- https://www.instagram.com/blankpagemuse/
Instagram Blog- https://www.instagram.com/blankpagemuseblog/
Twitter- https://twitter.com/BlankPageMuse
Wednesday, September 14, 2022
Shy Bear Christmas
Who has started their Christmas shopping? ME!! To be fair I only have 1 package and it's for my baby grand-daughter ... BUT IT COUNTS! SO I decided it was probably time to get started on my Christmas Cards. This card is quick and easy and would be perfect for mass productions. Stamp a bunch and then color them while you are catching up on your favorite shows!
keep adding colors until you have a festive card.
Mat onto cardstock and onto card base. Finish off with sticker greetings! Add stickles if desired to create twinkling lights!
See... quick and easy! SO many options and easy to reproduce!
I hope you are inspired to get creative with your stamps and
papers from Blank Page Muse and I Brake For Stamps. Don't forget to use my
discount code BPMChris.
Be sure to follow us at
The Blank Page Muse- https://blankpagemuse.com/
I Brake for Stamps-https://ibrakeforstamps.com/
FB Fan Page- https://www.facebook.com/groups/blankpagemuse/
Instagram Shop- https://www.instagram.com/blankpagemuse/
Instagram Blog- https://www.instagram.com/blankpagemuseblog/
Twitter- https://twitter.com/BlankPageMuse
Pintrest- https://www.pinterest.com/blankpagemuse/boards/
Sunday, September 11, 2022
Charming Silhouette Card
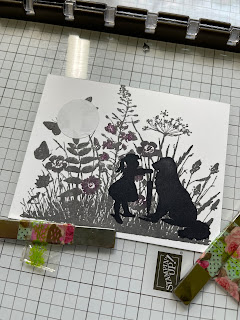
Greetings! Today I am excited to share this adorable silhouette card I created using my I Brake for Stamps stamps! I just love this little girl and her doggie! And I love the look of silhouette stamps! I can almost picture her telling her little friend to wait while she catches fireflies!
Supplies needed
I Brake For Stamps Girl and Dog Looking Eye to Eye Silhouette Stamp
I Brake for Stamps Half Sheet 138B
Masking paper, archival ink ( black and grey) , distress inks, Card base, white card stock, coordinating card stock, chipboard sentiment
Remove masking paper to reveal moon.
I hope you are inspired to get creative with your stamps and
papers from Blank Page Muse and I Brake For Stamps. Don't forget to use my
discount code BPMChris.
Be sure to follow us at
The Blank Page Muse- https://blankpagemuse.com/
I Brake for Stamps-https://ibrakeforstamps.com/
FB Fan Page- https://www.facebook.com/groups/blankpagemuse/
Instagram Shop- https://www.instagram.com/blankpagemuse/
Instagram Blog- https://www.instagram.com/blankpagemuseblog/
Twitter- https://twitter.com/BlankPageMuse
Pintrest- https://www.pinterest.com/blankpagemuse/boards/
Thursday, September 8, 2022
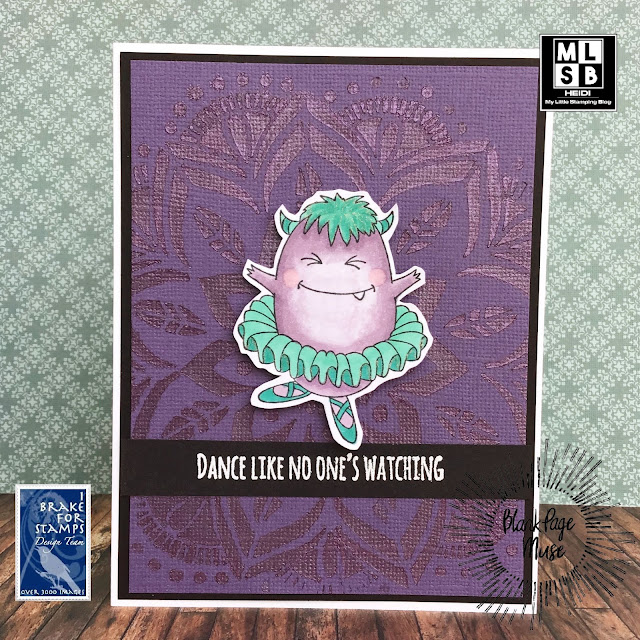
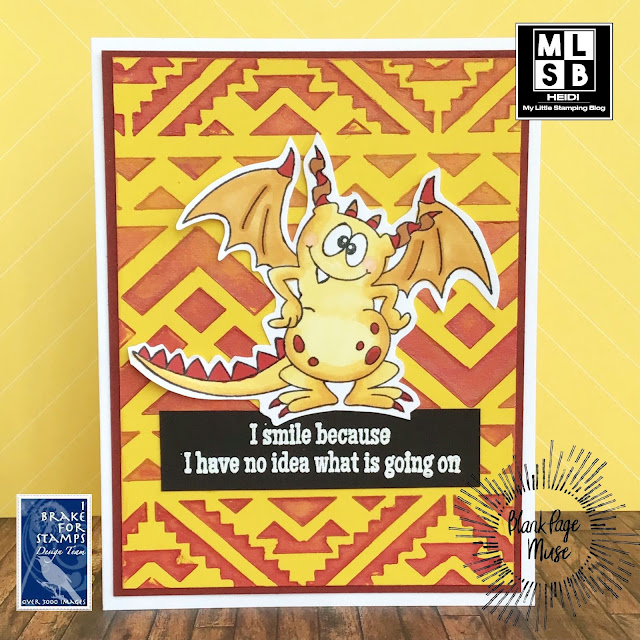
Stencil Butters and some cute Monster cards!
Hello from design team member, Heidi!
Blank Page Muse is now selling The Crafter’s Workshop Stencil butters! Kim sent me a few to try and I want to show you how much fun they are!
(Spoiler alert, when I got done playing with the ones I was sent, I immediately placed an order for more colors on my own dime! They are fun!)
The neat thing about these is that you can use them like a smooth modeling paste over stencils, they are nice and opaque! But you can also use some water on a brush and get a watery look with them too. So with one paste you can get two looks. They also come in shimmers and non-shimmers (just take a look on the website at the close up photo and it is obvious which are which). I think I like the shimmers better but can see how the flat ones would work better in many project types.
Stencil Butters in the Blank Page Muse shop
Thanks for visiting! Hope you have a crafty day!
You can also find more inspiration at the links below:
The Blank Page Muse- https://blankpagemuse.com/
FB Fan Page- https://www.facebook.com/groups/blankpagemuse/
Instagram Shop- https://www.instagram.com/blankpagemuse/
Instagram Blog- https://www.instagram.com/blankpagemuseblog/
Twitter- https://twitter.com/BlankPageMuse
Pintrest- https://www.pinterest.com/blankpagemuse/boards/
Saturday, September 3, 2022
Happy Birthday Pumpkin Tag
Hi everyone, Steph Ackerman here!


