Pages

Pages

Wednesday, January 31, 2018

Perspective Art Journal Page


I've got a sparkly little journal page for you today I call Perspective. Let's check it out!


Supplies:

The Blank Page Muse Stamps Angel Feathered Wings
The Blank Page Muse Stamps  Mannequin Dress Form Lady and Lace
Shades of red embossing powder
Extra Fine black glitter
StazOn Metallic Gold ink
Red and Gold shimmer ink sprays
Black stabilo pencil
Journal page
Matte gel
Embossing pad
White gesso
Scrap paper
Black tulle
Heat gun
Clip art sentiments
Old file folder

1. Begin by adhering scraps to your journal page with a light coat of white gesso.


2. Stamp the mannequin onto the file folder and heat emboss it. Make a second one for a mask so you can stamp the wings without getting any ink on the main image.
 I liked the way the gold ink looked on my mask, so  I decided to use it - and made another one as well on scrap paper!


Once the mannequins were all cut out, place them on the page and trace around them with the black pencil, smudging as you go.


Cut some tulle and rip some areas, creating holes & jagged edges.
Adhering it on the page was not easy! I used matte gel on my finger to press it down; but once an area started sticking down, then everything else was easier. While the gel was wet,  sprinkle on the glitter and use the heat gun to dry everything.
Add a pencil lined border and finish by adding the sentiments.


The embossing powders really make the mannequins stand out!


I wish you could see the sparkle of the fine glitter in person!


This was a fun project that turned out differently than I had originally planned - once I get going, I think of other things to do & I end up in another direction!

Why not come join us at The Blank Page Muse Stamps Fan Group and show us your planned - or totally unexpected - Blank Page Muse creations!


Monday, January 29, 2018

Birds of a Feather Note Card


Hi everyone! Leslie from Love To Scrap 2 here with you today to share a Blank Page Muse Inspiration Team project tutorial!

Supplies Used:
Flower & Bird Sketches Stamp Set
Rosette Hearts Stamp Set
Alcohol markers
Flag die or punch
Background paper
Clip art ephemera
Dark brown ink pad
Double stick tape
3-D foam tape
Ribbon and trim
Cardstock
Blue rhinestones

Stamp the sentiment and bird from the Flower & Bird Sketches Stamp Set, and stamp the large background from the Rosette Hearts Stamp Set on ivory cardstock.


Color the bird with alcohol markers then cut out.
Die cut or punch out the stamped sentiment.
Cut stamped background in half.
Pick out background paper(s) and other ephemera to use on the card.
Ink the edges of all the elements with brown ink pad.


Tear 'nicks' in some of the edges of the pieces and add more ink, then begin layering all the elements onto the background piece using double stick and 3-D foam tape.


Tear some 'nicks' into the outer edges of the background piece and add a little more ink.
Add ribbon and trim to the tag.

Layer the front and inside panels on dark brown cardstock and adhere to card base.


Mix brown ink with a bit of water and splatter onto the card.
Finish card with a few rhinestones.

One final close up. Pretty happy with how this turned out! :)


I hope you’ve enjoyed today’s project! Be sure to check out the Blank Page Muse Facebook Fan Page, and be sure to check out all the fun stamp sets at the Blank Page Muse store! Thanks so much for stopping by today – we’ll see you next time! ;)

Scrappy hugs,
lesliesig

Saturday, January 27, 2018

Special Valentine Treat by Pam Bray + A Super Helpful Tip for Your Un-Mounted Rubber Stamps!


Happy Weekend Everyone!
Today we have a special Valentine Treat to share. It's a very special post by Pam Bray. Read on below to see how she creates her amazing layers in all of her projects. A special bonus, she includes a helpful tip on how to use your unmounted rubber stamps.
We'd love it if you left her some comment love here and over on her blog!
Read on!
Big thanks to Pam for letting us publish the here, too :)


Learn, Live and Hope is such a fabulous inspirational message!!! It just inspires love and dreams! I can't help but to share the love as we go into Feb and seeing all the Valentine inspiration that is already being shared. 

 
Today I created a Valentine inspired card using the stamps from Blank Page Muse. I began my card by painting a piece of white card stock using DecoArt Media paints. 

 
Because my stamps are unmounted I thought i would run them through my Xyron 3" Disposable Sticker Maker to see if they would fit and work on a stamp block. I AM SO EXCITED TO SHARE...THEY WORK PERFECTLY!!!! Once you are done stamping, remove them from the stamp block and place back on the adhesive sheet. Place in small plastic bag or other stamp container. 

 
Place stamps on stamp block and stamp card stock with Fired Brick Distress Ink. 

 
Cut painted card stock down to fit on stamped background card stock. Stamp background image on top. 

 
Die cut Trifecta pieces from white card stock; emboss with Emerald Creek Supplies Embossing Powder. 

 
Adhere distress red card stock; stamped background pieces and embossed cut out to top of card base. 
Spatter with white and black paint. 


Stamp heart and butterflies on card stock using Archival ink. 

 
Color fussy cut images out with Distress Markers.

 
Layer butterflies together at bodies; tip wings up and add to front of card. 

 
Add stamped sentiment to front of card with pop dots. 

 
Adhere chipboard to card front. Layer hearts together and place on front of card with pop dots. Add bow. 

 
Add a second prepared butterfly to top of card. 


I hope you are inspired to check out all of Blank Page Muse Stamps to create your Valentine cards and projects with. Pam 

Supplies:
Hop over to Pam's Blog to get her full supply list.

Blank Page Muse Stamps designed by Pam:

Friday, January 26, 2018

Make A Wish


Hi Everyone, Jess here today.

I have a major love for things with wings.  I put wings on almost everything.  I fell in love with this stamp from the Fairies and Blossoms 2 set.  This would make a great card for several occasions and can come together very quickly.

Product List:
Fairies and Blossoms 2 set
Embossing Folder
Cardstock
Black Archival Ink
Word Stickers
Black Pen
Glitter Pen
Coloring Sticks

Stamp your image twice and fussy cut out one of them.  Color in your image using your color sticks. 


Cut and color the wing from your second image. 

 Bend just the edge and glue onto your fairy.
Emboss your card and using your sparkle pen highlight the raised areas. 
Adhere your colored cardstock onto of your embossed piece, add your stamped image, 
and choose your sentiment.  
The only thing that takes a bit on this card is coloring your image.
 I like to stamp a bunch, so just sit and color.  
Enjoy!


Wednesday, January 24, 2018

Turquoise Art Journalling

Hello everyone


This month color is turquoise, silver and sparkle.
 These colors inspired me to make a moonlit fairy tale scene in my art journal.

Supply list:

Blank page Muse stamps used:  Phoebe and  the Moon
Gesso
Matte medium
Patterned paper
Silver metallic paint
Shimmer mister in turquoise
Cobalt teal hue acrylic paint
Metallic markers in silver, blue and teal
Sentiment (printed or stamped)
Turquoise waterproof stampink

I made a video to show you how this page was made


Here some more photo's to show you the details of the page.


Thanks for visiting, hope to see you in the challenge.

Please also visit our facebook fan group and the company page

Monday, January 22, 2018

Indulge Your Imagination

Hi Everyone, Cathy N. here with a card to indulge your imagination!

Supplies:
Blank Page Muse Stamps

  1. Chicken Wire Mesh
  2. Old Style Key with Wings
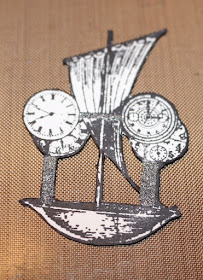
  3. Steampunk Airship Sail and Clocks
  4. Steampunk Pocket Watch with Wings
  5. Black and White cardstock
  6. Acrylic paint- turquoise and silver.
  7. Markers
  8. Glitter pen
  9. Washi tape
  10. Black ink
  11. Foam tape.


Paint your white cardstock with the turquoise paint.

Use a sponge to add some silver paint, making for a nice textured look.

I used this on my New years Eve party crown so if you think you saw it before, you did.
 I really like how the colors came out.

Cut this down to fit on a card size of your choice.
Apply some silver paint to the Chicken Wire Mesh  and stamp randomly onto the card.
Edge the sides of the card with the same silver paint.

Ink up the  Old Style Key with Wings with black ink and stamp onto the card as shown.


Stamp the Steampunk Airship Sail and Clocks onto white cardstock and cut out.

Color in the image with markers and add a little sparkle to the sail with the glitter pen.

 Accent the bottom of the card with your washi tape before matting the card onto the black cardstock.

I added wings to the ship by cutting off the wings from Steampunk Pocket Watch with Wings.  and adhered them with foam tape for dimension.
I finished the card with a stamped sentiment.

   Follow us on Facebook
Join the Blank Page Muse. HERE 

Saturday, January 20, 2018

Hummingbird Flourish Daydream Card


Hello Stampers,

Welcome, I'm so glad you could stop by.
This is my second post for the new Blank Page Muse Inspiration team!
I created the background for the card below using a single stamp and lots of different techniques.

Sometimes it is good to be reminded that one doesn't need loads of stamps/supplies to make a fabulous project. So next time you feel overwhelmed by choices, limit your number of images and be pleasantly surprised at what you can create. I hope you enjoy my tutorial.

Here is my card Hummingbird Flourish Daydream.


Birds & Clocks Rubber Stamp Set                                            Back Ground Grunge - Pam Bray Designs
http://blankpagemuse.com/birds-clocks-rubber-stamp-set/


                      Other Supplies: 

  • Card base 6x6"
  • Oxide ink pad (faded jeans) or any other blue ink pad
  • Sponge dabber
  • Clear embossing powder
  • Watermark ink pad
  • Heat gun
  • Spray mister
  • White pearl cardstock
  • White ribbon rose
  • Pearl embellishments
  • Foam tape

Directions:
1. Use watermark ink to randomly stamp flourishes along the edge of the paper. Make sure to turn the stamp with each new impression to vary the design and stamp some images off the edge of the paper. Then apply clear embossing powder and heat set.

2. Use a sponge applicator to apply the blue ink over the embossed images. Apply the ink heavily along the edges and gradually fade to white near the center of the card. Make sure to wipe over the embossed designs with a tissue to remove any excess ink that remains upon the glossy embossed surface.

 
(Note: The right side has been wiped clean which shows a noticeable contrast.)

3. Create a wet spongy surface large enough for the stamp by folding a few paper towels and wetting it. Tap the flourish stamp to lightly wet it and then stamp as one normally would with an inked stamp. The water reacts with the Distress Oxide Ink to create a ghost-like image because the stamp removes some of the ink.
4. To create a subtle speckled texture, unscrew a spray water bottle, hold the end, and flick water droplets off the straw onto the page.
 
5. Stamp the hummingbird onto white pearl cardstock and carefully cut out. Next, stamp an additional image and cut out just the wing. Assemble it with 3D foam tape for added dimension and set aside.

6. Stamp flourishes in the middle of the card (1st generation). Next, use second generation stamping to create a cluster of flourishes. Without re-inking, stamp the flourish overlapping the protective mask. Discard the mask and reveal a lighter impression (2nd generation).
  
Make a mask by stamping the flourish onto a bit of scrap paper and cutting it out. 
Place the mask temporarily over the area you want to protect from ink.
 
(TIP: This technique can even produce a 3rd generation image for added depth.)

7. Adhere the hummingbird and ribbon rose to the center of the flourishes.
Stamp and fussy cut additional flourishes and tuck them in behind to add texture.

8. Matte the finished piece onto white pearl cardstock.  Finally, embellish the rose & bird with some pearls. Add extra pearls around the bird and rose.


To purchase the stamps to complete this project, visit www.blankpagemuse.com

For more inspiring paper-craft projects from the Design Team,
be sure to visit us at The Blank Page Muse Blog

Follow us on Facebook and
Join the Blank Page Muse Fan Group. HERE

To learn more about our designer Karen, please visit her blog, Art & Soul.
Thanks for visiting!